A bike is one of the most magnificent contraptions ever made. In my opinion there has never been and likely will never be another invention that allows for human movement as efficiently as a bicycle, not to mention that it is so much fun! There are only a few activities that when performed bring an almost involuntary smile to your face. Take notice the next time you grab your bike and start cranking on those pedals, as the speed builds and you feel the wind in your face, I bet there is a smile on your face. One of the other activities, swinging. Don’t believe me? Next time you are near a playground, go for a swing and tell me you don’t smile, regardless of your age!
Like all activities and hobbies, things can get expensive if you let them. I own several bikes: somewhere between “not enough” and “just one more”. Everything from carbon frame road bikes with hydraulic disc brakes to a single speed steel mountain bike and many in between. I like to ride all of my bikes and for different reasons and purposes, however, there are a few of them that bring me joy no matter what, and the funny thing is: these tend to be the older, heavier, “uglier” bikes.
Perhaps it is the stories they tell, nostalgia, or some other intangible aesthetic, but embrace it and don’t let the haters get you down! While the cycling community as a whole is a pretty relaxed group, there will always be a few sideways glances as you cruise down the greenway on your purple Huffy. Who cares, they are probably jealous! There will always be pressure to upgrade or get the new thing, and I would be lying if I said I never went down that path, but rest assured there is nothing wrong with keeping your ugly bike.
This is where I’ll get on the safety and maintenance soapbox. If your ugly bike hasn’t been ridden for some time, it would be a good idea to get it serviced. Bearings can dry out, brake pads harden, and tires can crack. Fortunately, older bikes are easy to work on and fix, either by yourself or a shop.
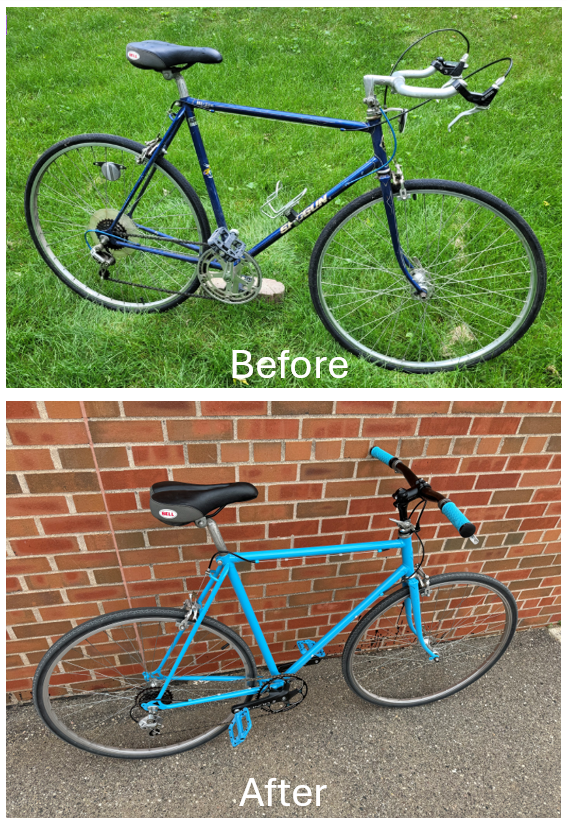
Another option is giving that ugly bike a brand new set of clothes. The images below are of a bike that was saved by my wife’s grandpa on a trash pick-up day. I rode that bike many miles as a commuter, and finally decided I didn’t want to get rid of it, but also wanted to give it a second life. This was an extensive project that included stripping the bike completely, deep cleaning, a few new components, and a paint job. I think the end result is great and I’m glad I gave this ugly bike a second chance.
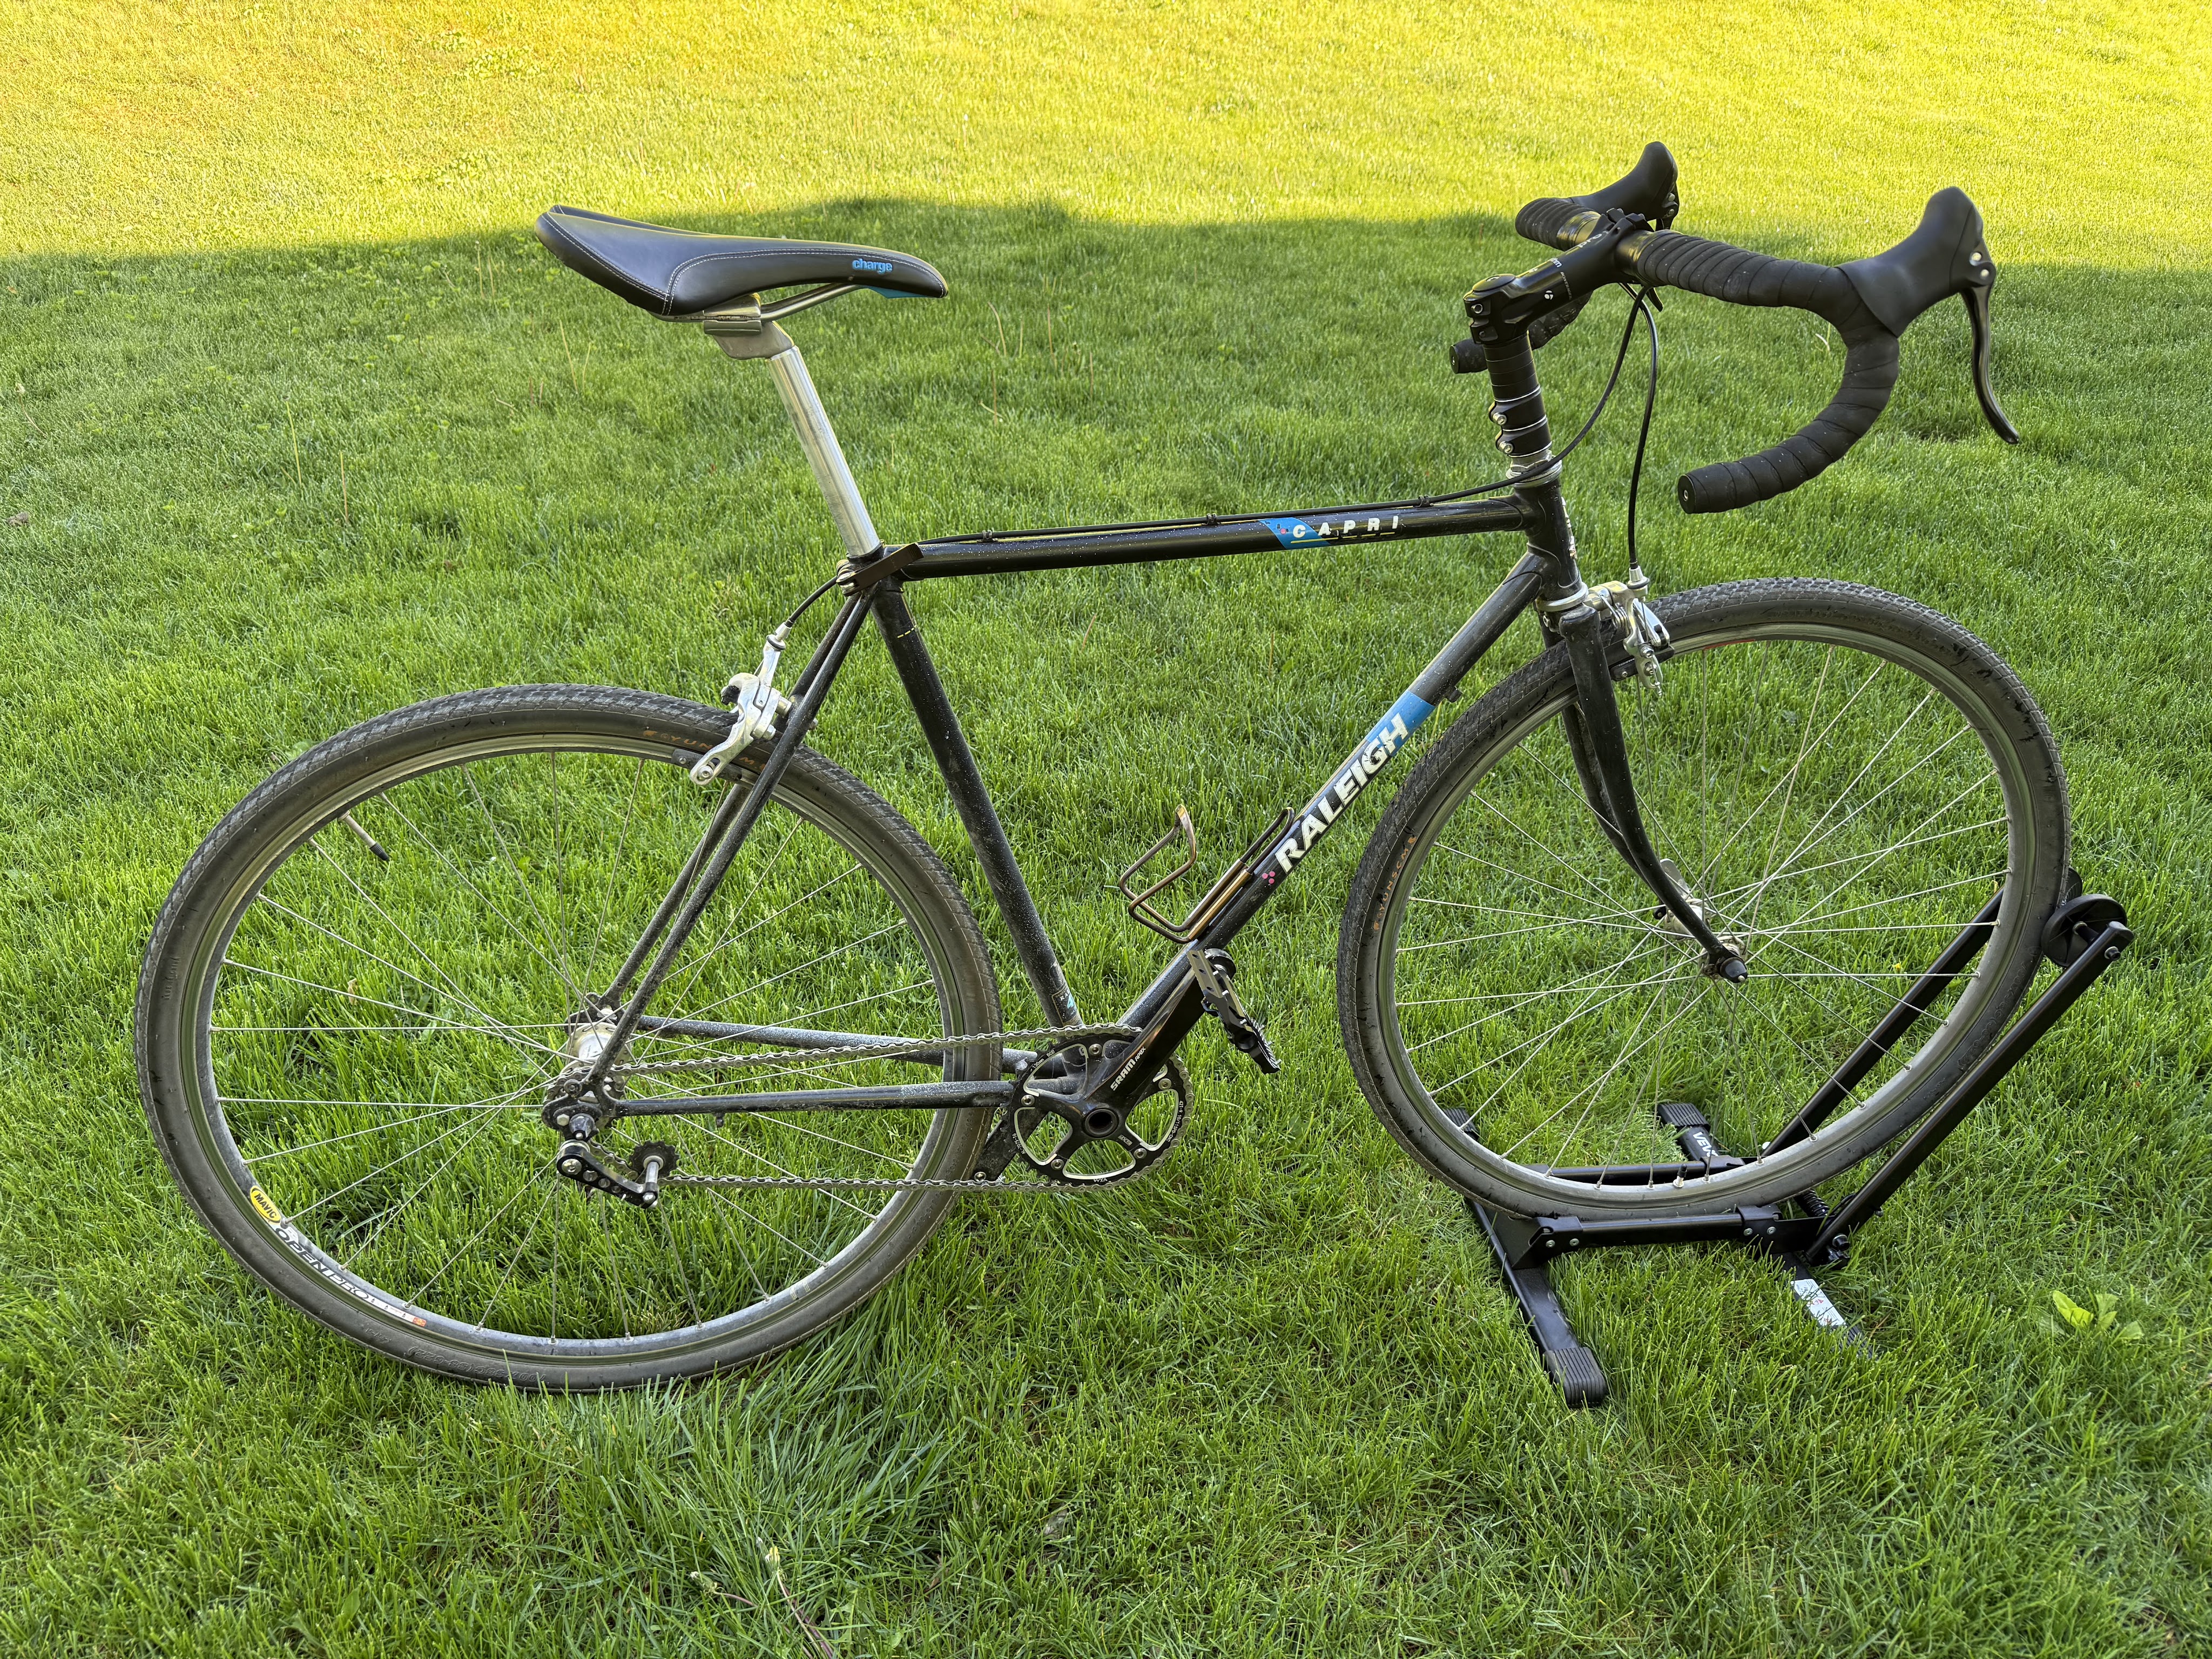
The next bike is also a favorite of mine. It is a vintage Raleigh steel frame, turned into a single speed bike. This bike has mismatched parts, is a little too small for me, and I had to “get creative” on the fork and stem junction, but I love it. This one even carried me on a 54 mile gravel (mud) race and performed brilliantly, much better than the rider.
The bottom line is that cycling should be fun and bring you joy. For some, that is getting the lightest, highest tech bike money can buy. For others, that might mean pulling that old Huffy out of the rafters and getting it cleaned up. If you have an ugly bike, embrace it and go for a ride!
“Riding a bicycle is the closest you can get to flying”, Robin Williams
I have an active household, with two teenage boys (and myself) that love biking, Nordic skiing and running; we go through a lot of drink mixes. Our kitchen can sometimes look like a laboratory, with various powders, scales and concoctions strewn about in the name of science. OK, maybe that is putting too much weight on a beverage, but getting the right balance of electrolytes and carbs can make or break your next endurance race or long training event. My wife might tell you that I tend to go off the deep end for certain things like biking, ski waxing or, in this case, drink mixes for training and racing. The result of this deep dive is this lengthy blog post, but I think it will be worth it. In addition to my personal quest for hydration glory, my two sons also have unique needs that prompted even further investigation. One of my sons has been diagnosed with a condition called neurocardiogenic syncope (NCS). Basically, he experiences a sudden drop in blood pressure causing him to faint. While NCS is a different disorder than POTS (Postural Orthostatic Tachycardia Syndrome), they are both a form of dysautonomia, can have similar symptoms, and in both cases one of treatments is usually to increase salt intake. My other son has always dealt with stomach issues, and finally after many tests, we found out that he has a low level of the enzyme sucrase-isomaltase, making it difficult to digest sucrose (table sugar). In rare cases, there may be a complete absence of the enzyme in which the condition is called CSID (Congenital Sucrase-Isomaltase Deficiency). For him, this is unfortunate, since many sports drinks and snacks use sucrose. It all made sense why he would get bad stomach aches during intense activity. What we thought was related to the activities themselves, was actually related to the stuff he was eating and drinking prior to and during those activities.
This is where I need to mention I am not a doctor or nutritionist, and if you are questioning any of this it would probably be best to consult a professional. OK, that is out of the way, lets dive in. I am going to break this up into two main parts: electrolytes and carbohydrates, then bring them back together in the end.
Let’s start with electrolytes. Electrolytes are minerals that our bodies use to help maintain fluid balance, muscle contractions and nerve function. The most common electrolytes are sodium (Na), magnesium (Mg), potassium (K) and calcium (Ca). Most of the time we get enough of these minerals in our everyday life that we don’t need electrolyte infused beverages and we can just drink water. However, if there is a lot of sweat loss due to heat, exertion or illness then replenishing your electrolytes might be needed. Also, as mentioned above, an increase in sodium can be beneficial to treat the symptoms of POTS and NCS, by increasing blood pressure. Be sure to meet with a doctor if you think you have either of these conditions.
In our electrolyte mix, the main focus is on sodium since the majority of electrolytes lost through sweat is in the form of sodium chloride. I still include magnesium, potassium and calcium as well. There are different ways to get these electrolytes too. Some options for sodium include sodium chloride (table salt) and sodium citrate. Sodium chloride is cheap, easily available and has that distinct salty taste, while sodium citrate doesn’t have a strong salty flavor, is more expensive and some people don’t care for the almost tangy flavor of it. I actually prefer the salty flavor of table salt. For magnesium, I use magnesium malate which is one of the forms that is less disruptive to the stomach. Avoid magnesium citrate as its primary use is a laxative! For potassium I use potassium citrate and for calcium I use calcium citrate. Now let’s put it all together. Note that the amounts of the compound are different than the amount of mineral you get, this is because not all of sodium chloride is sodium, in fact only 40% is sodium. So to get 1 gram of sodium, you need to ingest 2.5g of sodium chloride.
1 Liter Electrolyte Drink
2.5 g sodium chloride (1000 mg sodium)
1.25 g magnesium malate (200 mg magnesium)
0.25 g potassium citrate (100 mg potassium)
0.75 g calcium citrate (165 mg calcium)
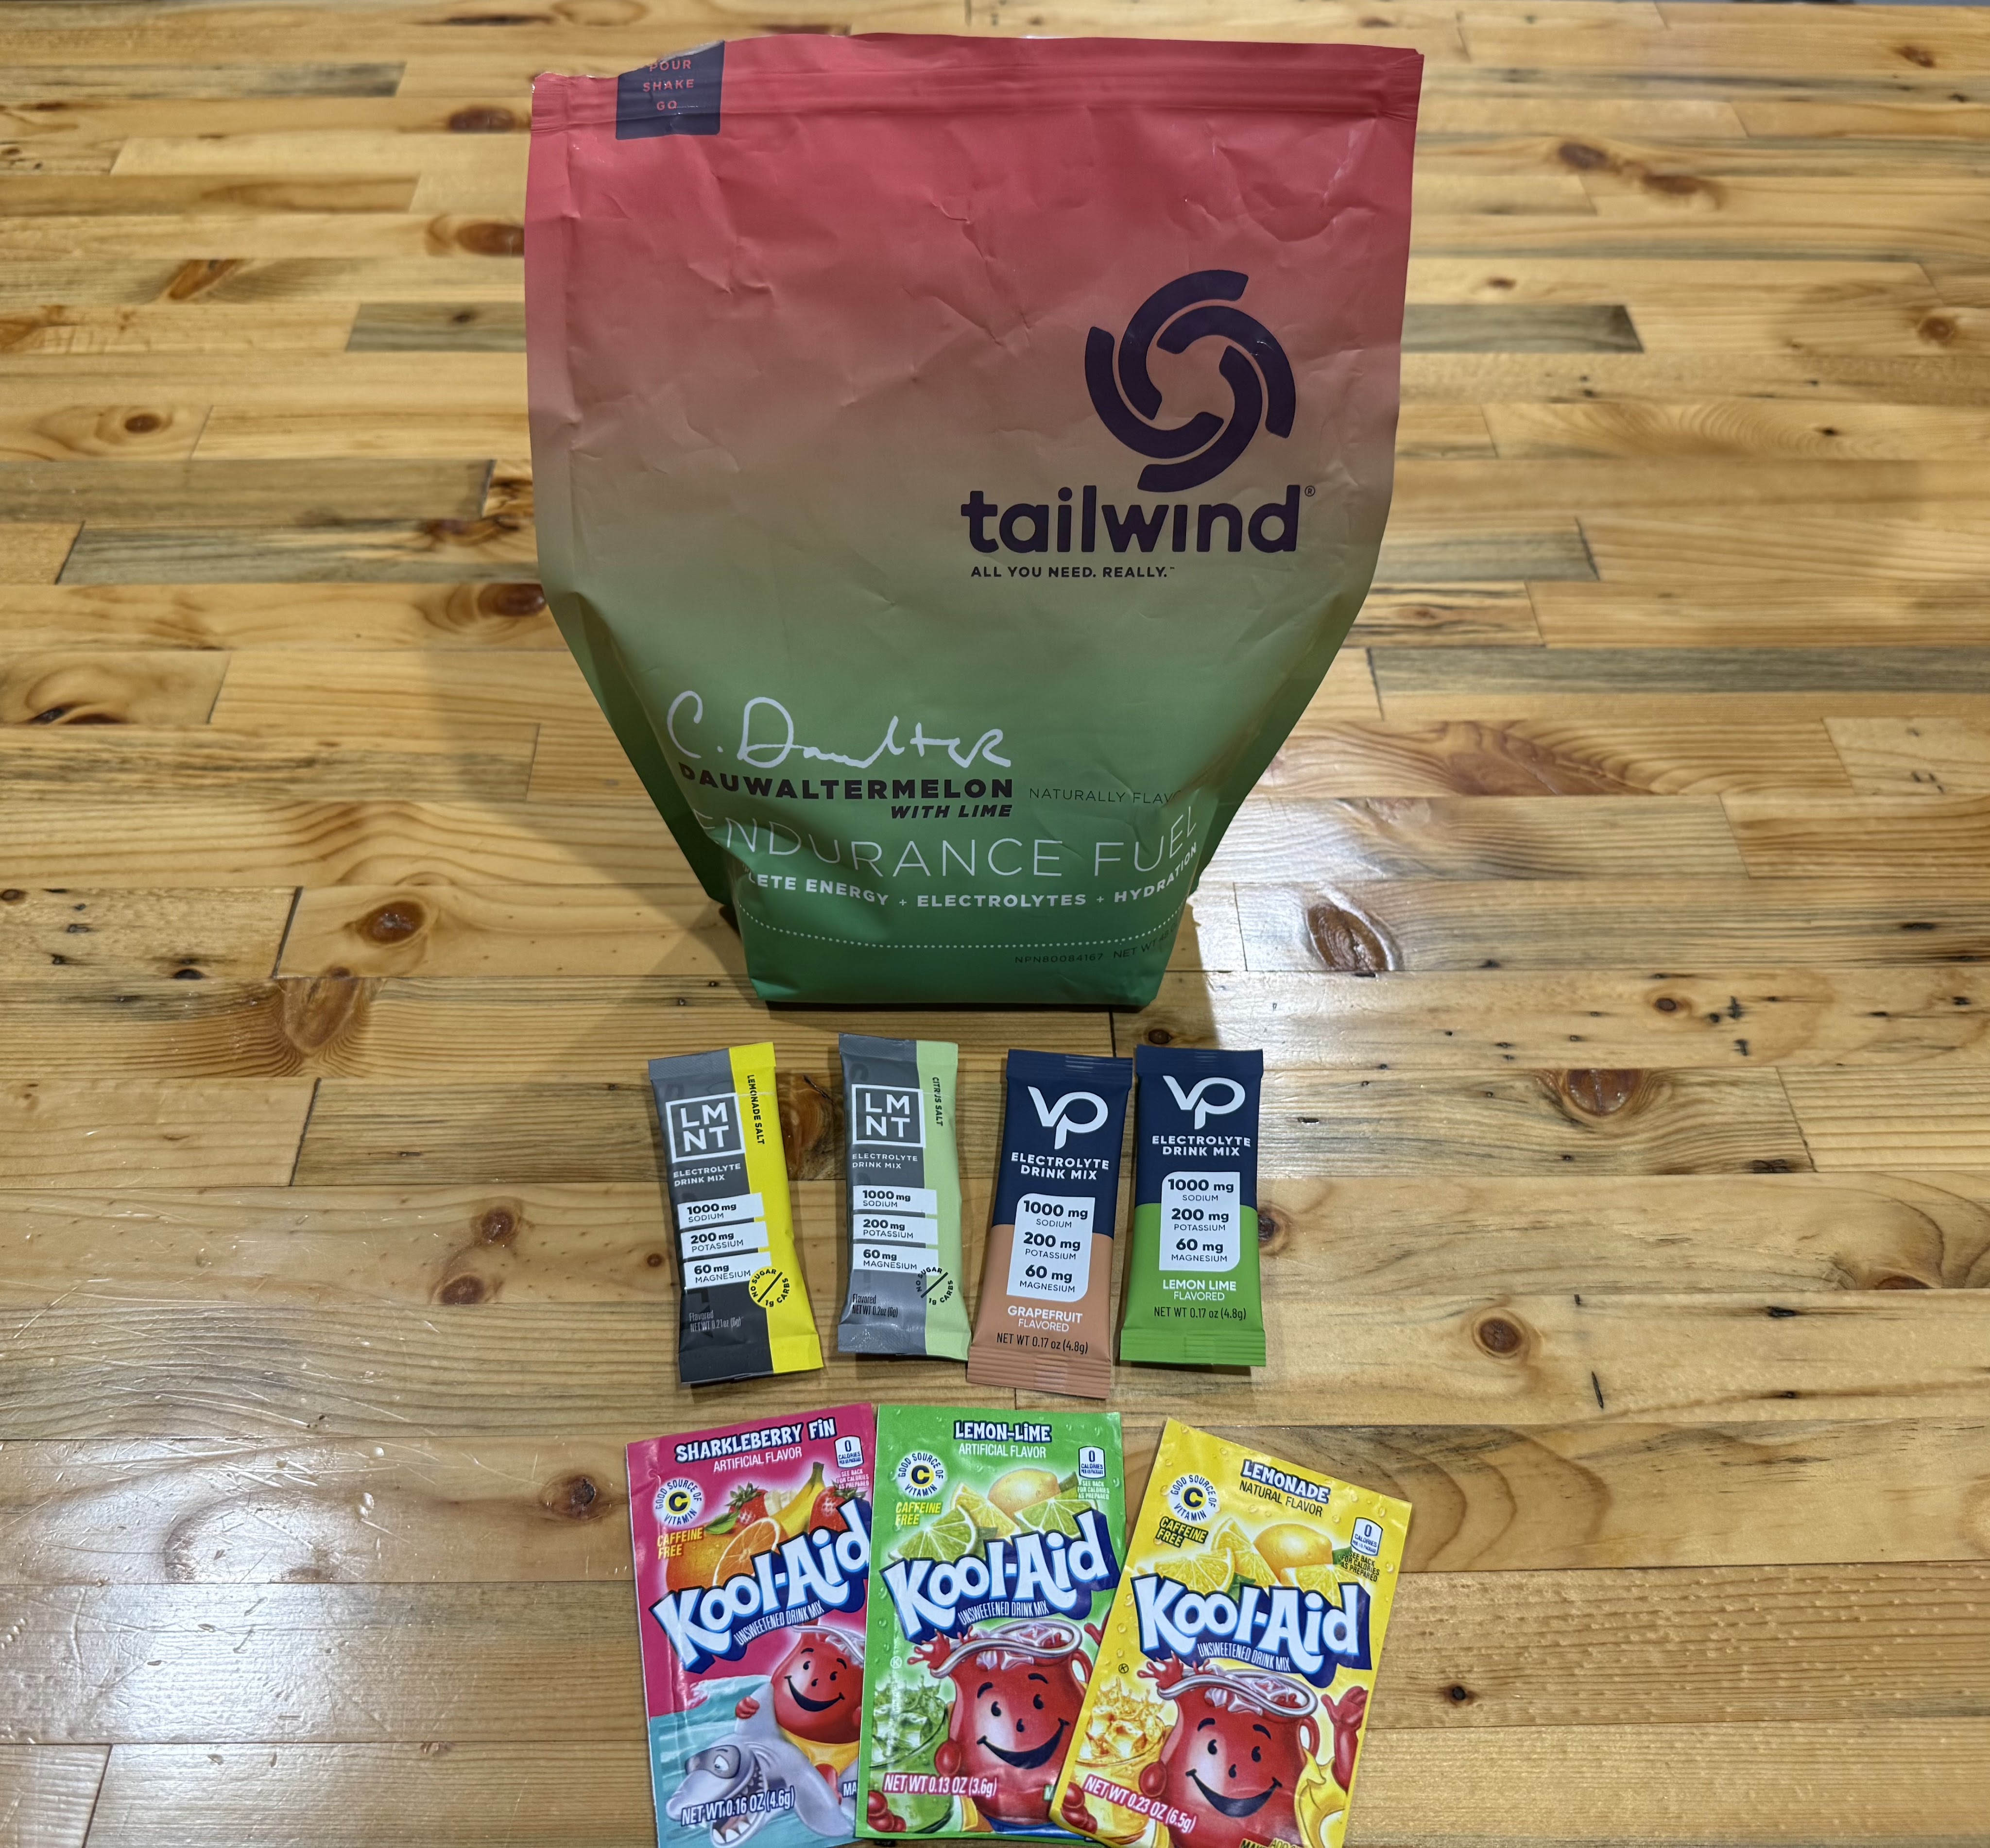
Note that calcium citrate is not very soluble, in fact, only about 1 gram will dissolve in 1 liter of water. If more than a gram is added it will likely just settle to the bottom and get dumped out later. This mixture can be consumed as it is, or if desired add some lemon juice, or a flavor packet such as Welches or Crystal Light. That is the stand alone electrolyte drink, similar to what you could buy already made for you. If buying a pre-done mix is more your style there are several options. Two of them that I have used and fully endorse are LMNT and Venture Pal.
Now let’s get into carbohydrates. When we talk about carbohydrates for endurance athletes we are not talking about a big bowl of alfredo before the fun run like Michael Scott. For us, we are talking about sugar, however sugar is not as simple as you thought, pun-intended.
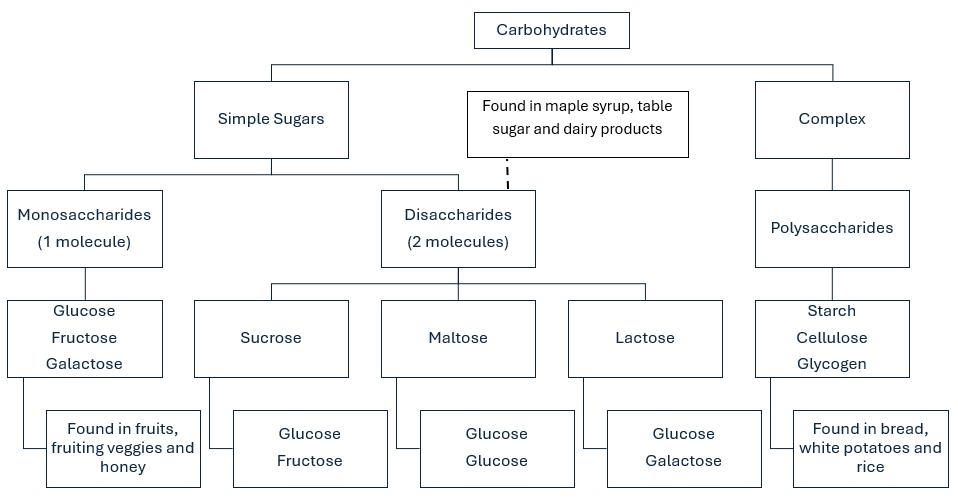
Carbohydrates can be broken down into two groups: Complex which are also called polysaccharides and simple sugars which have two groups, monosaccharides and disaccharides. Monosaccharides include glucose (dextrose) and fructose and galactose. Disaccharides include sucrose, maltose and lactose, which have to take another step to break down into glucose, fructose and galactose. Another popular substance used in carbohydrate drinks is maltodextrine. This is technically a polysaccharide, but it breaks down rapidly into glucose. For most people this may be a good option, but unfortunately, it requires the same isomaltase enzyme that my son is deficient in. For this reason I stick to straight glucose and fructose. Glucose absorbs nearly instantly, giving us a burst of energy quickly, while fructose needs to be converted to glucose by the liver first, so it has a “metering out” effect. More science is coming: Our bodies use something called transporters to absorb glucose and fructose and there is a limit to how quickly we can absorb them. Fortunately, there is a different transporter used for glucose than fructose, meaning we can manage each of them separately in order to maximize the amount of total absorption. Research has also shown that the optimum ratio of glucose to fructose is 2:1 and furthermore the maximum absorption rate is a bit over 100 grams per hour. However, more than 90 g/h and an upset stomach can occur, therefore 90 g/h is considered a safe maximum. This doesn’t mean that 90 g/h is required for all activities. A rough guideline for activities and required carbs is as follows:
1-1.5 hours: 30 g/hour
1.5-2 hours: 60 g/hour
2+ hours: 90 g/hour
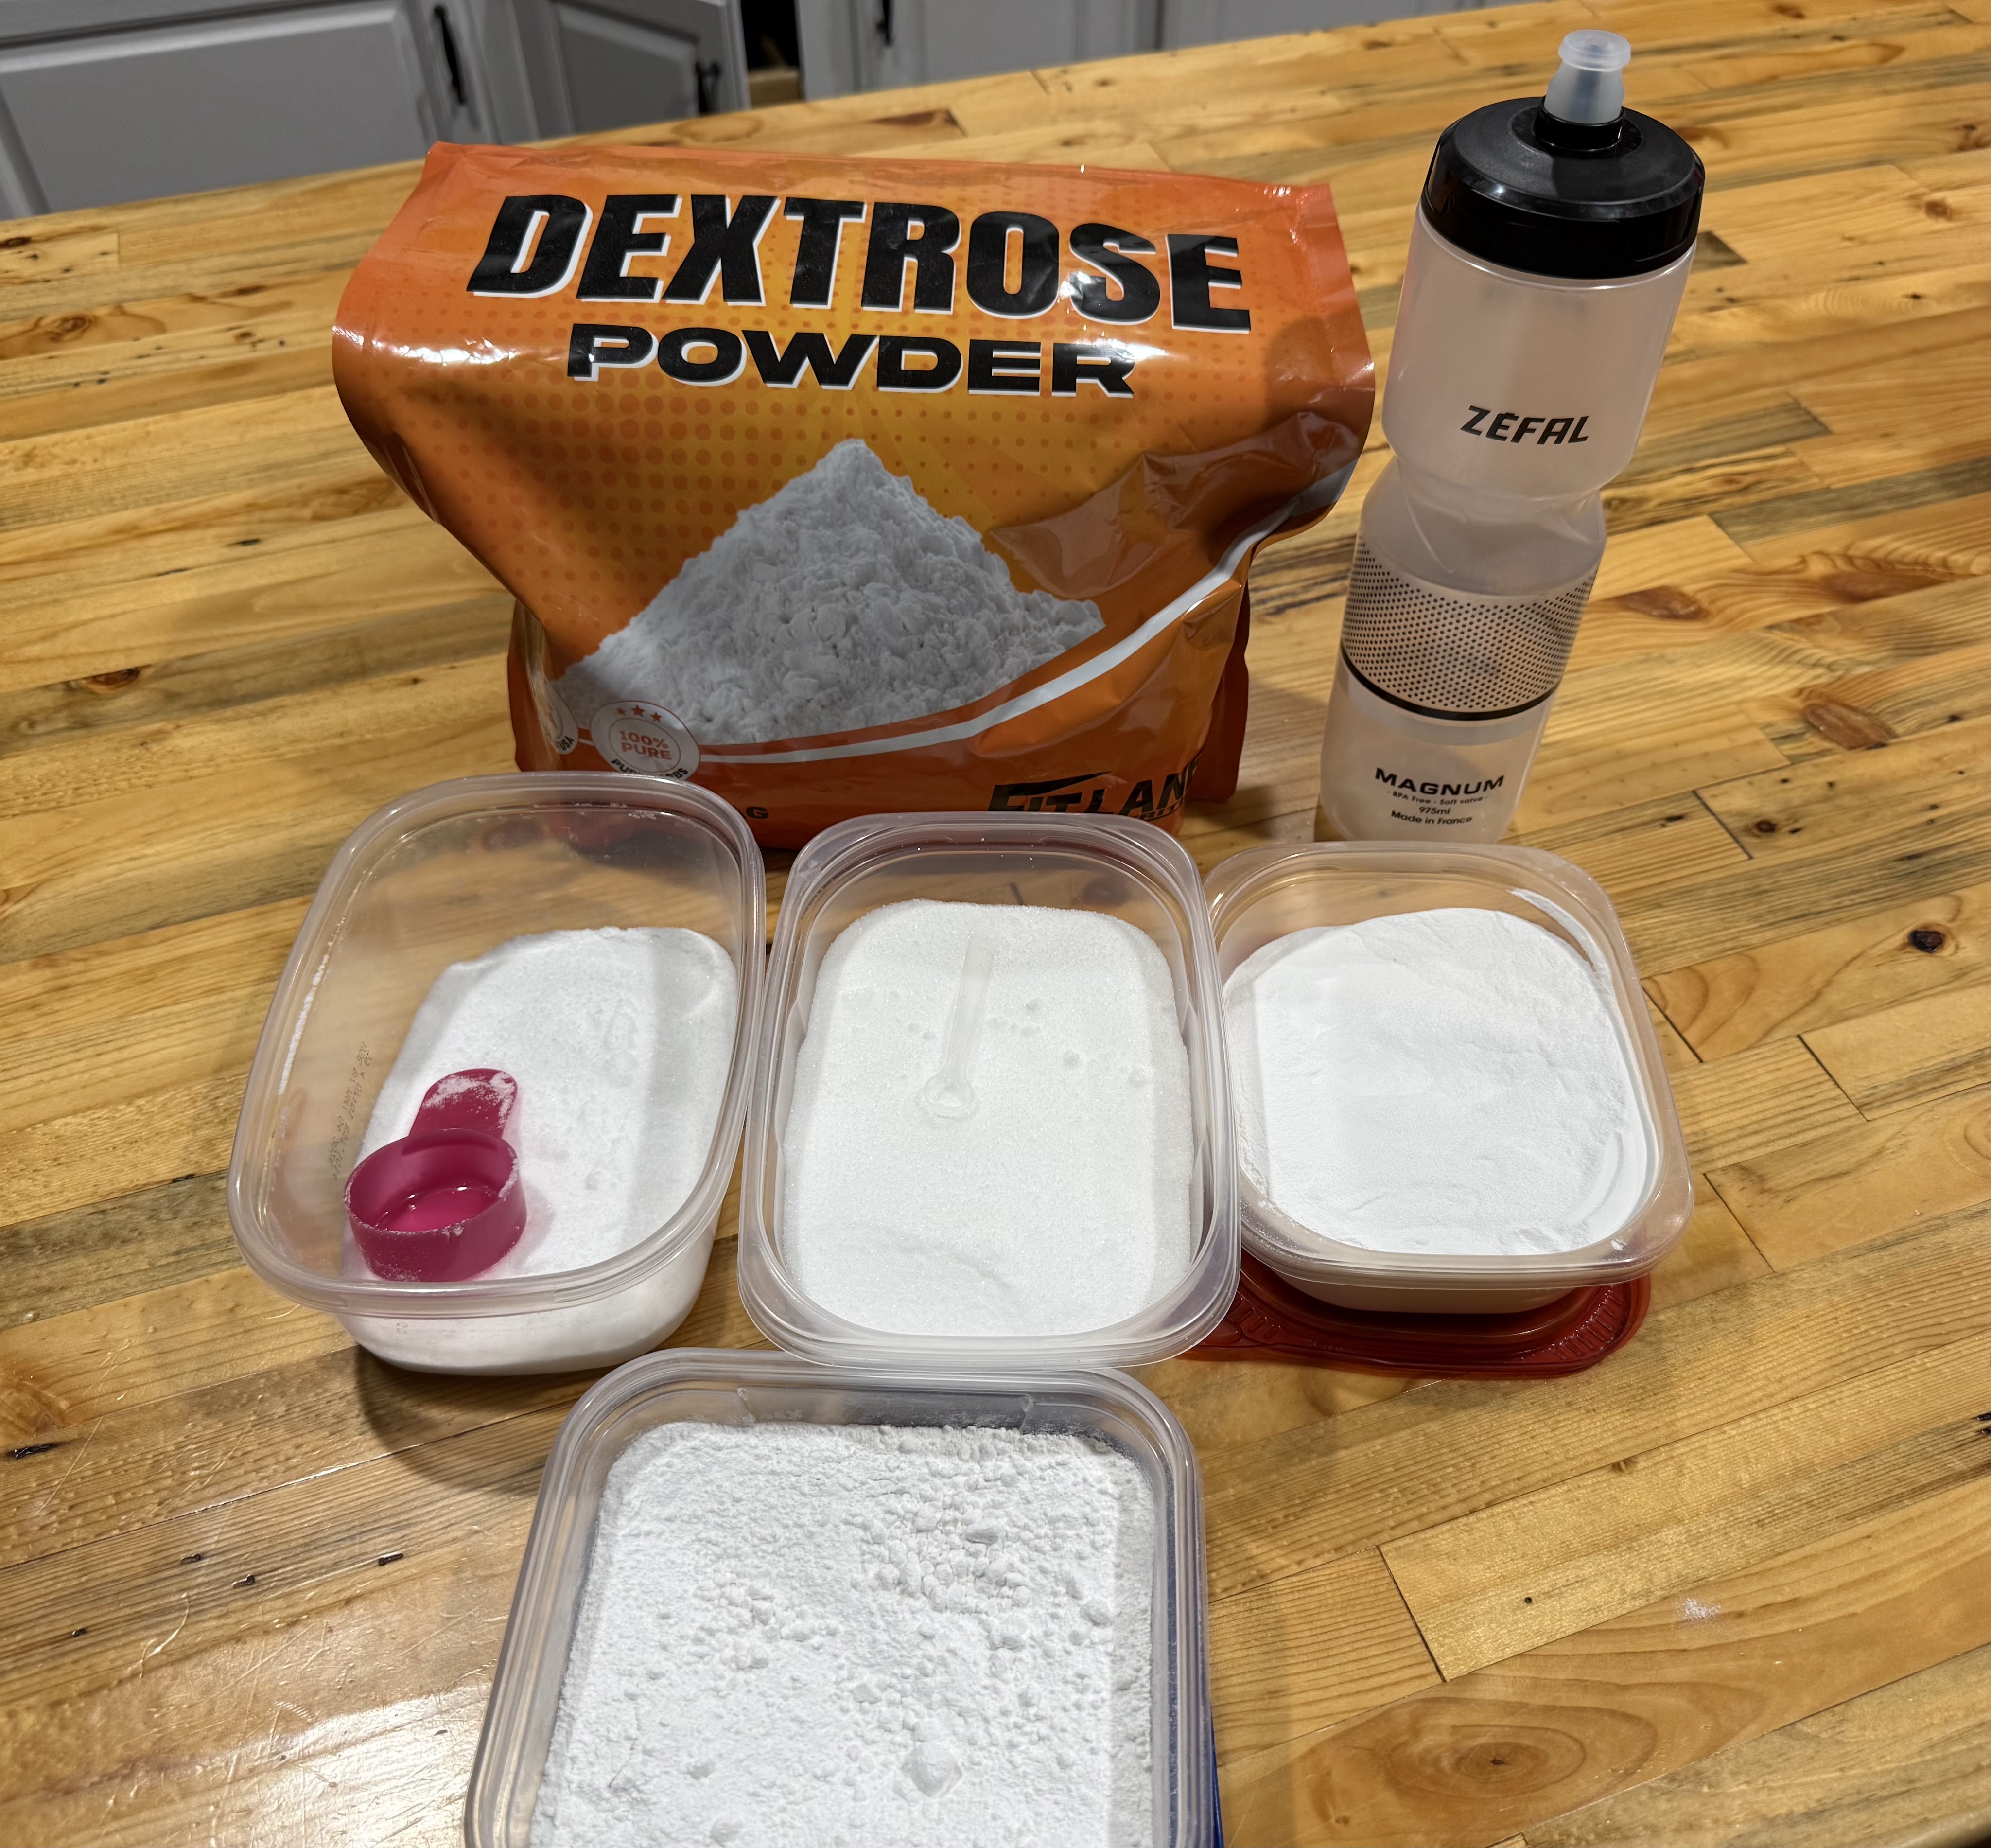
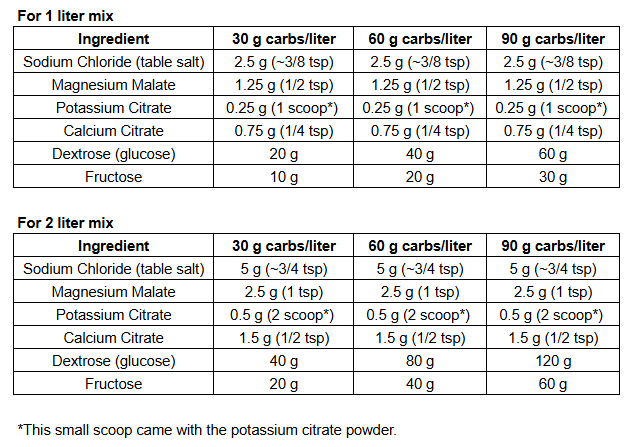
Now it’s time to put it all together. In order to simplify things as much as possible I organized a chart with two different volume sizes: a 1 liter bottle and a 2 liter jug or hydration bladder. Each of those can be filled with either a 30, 60 or 90 gram dose of carbs depending on your activity. Additionally, I added the electrolyte ingredients to this chart as well. What about flavor you may ask? Just imagine the Kool-aid man smashing through that brick wall. When making a 2 liter batch a packet of original Kool-aid flavor is perfect. There are many flavors to choose from and the dextrose/fructose take the place of the sugar. Even when I’m not needing to take 2 liters with me on the activity, I will often make a 2 liter jug and keep it in the fridge for convenience.
Just like the electrolyte mix, there are also carb mixes that are available, and sometimes it is easier to buy pre-made powder. The advantage of making it yourself aside from long term cost savings, is that electrolytes and carbs can be combined into one. If looking for an option to purchase I would recommend Tailwind, it comes in many flavors and is what powered me through the Lutsen 99er, before I went down the drink mix rabbit hole.
Below is a complete list of all the ingredients and products that I have mentioned. Please note that these are affiliate links, meaning that if you click and purchase through these links, I may get a small commission at no cost to you, however I would never recommend something that I have not personally used and trust.
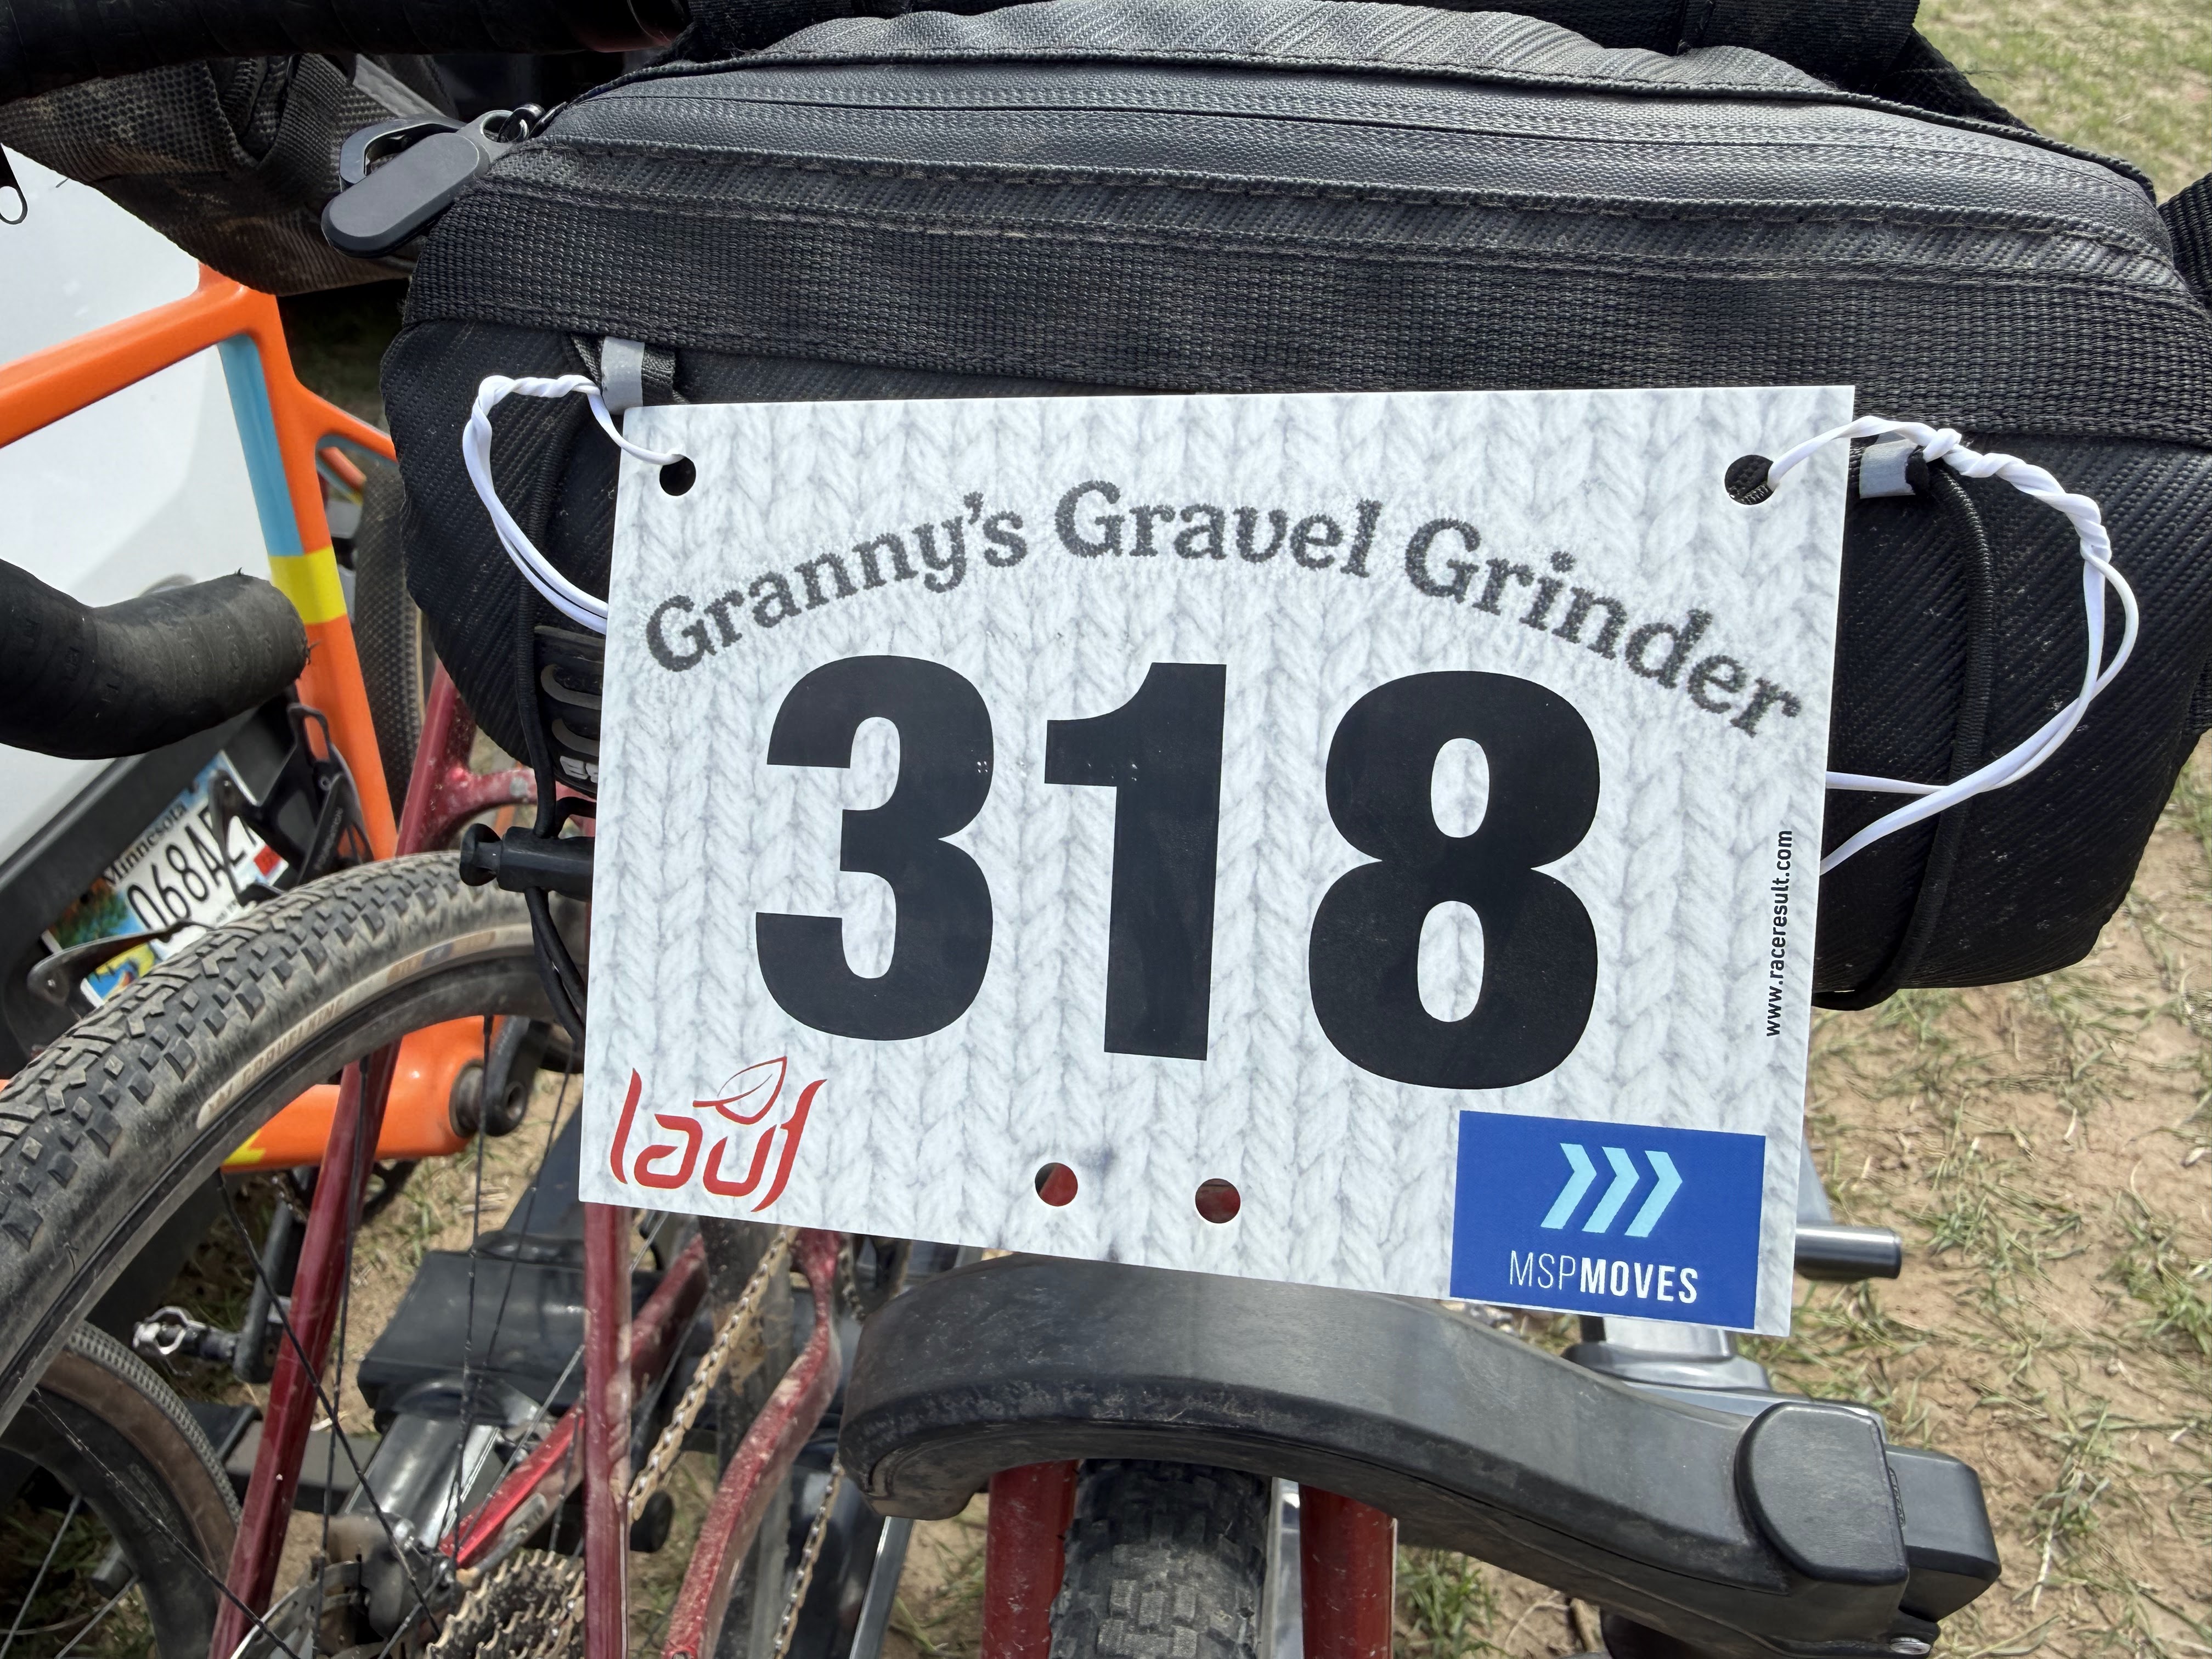
Grass roots bike events are special. It is rare that you will find big corporate sponsor tents, media coverage or big pay outs. What you will find are nice people, small crowds and home brew aid stations. Granny’s Gravel Grinder is no exception…well there are a couple exceptions, at Granny’s you also get post race tacos and a root beer float!
Granny’s Gravel Grinder is a race put on by Chase Wark of Wark’s Cycling Services and is quite literally hosted from his grandma’s house in central Minnesota. Chase also puts on the The Hotdish 100 race which takes place in Winona, MN. Together with the Day Across Minnesota (DAMN) and the Filthy 50, they make up the Northstar Gravel Series. At Granny’s you can choose from three distances: 100, 50 and 25 miles.
2026 marks the 4th year of the event and my third trip to Granny’s house, and to be clear I am no elite athlete, I enjoy endurance events because of the challenge, I’m not out there to win and my results show that! Two years ago I did the 50 mile event, which was my first long distance race ever. It rained all night and into the start of the race. It was a total mud-fest and a total blast, made even harder by my decision to ride my single speed. Last year I decided I needed more punishment and did the 100 mile, as it was part of my prep for the Lutsen 99er. The weather was perfect, but the race was very difficult for me. Those last 30 miles are brutal! Oh and by the way, when I say it is a 100 or 50 miles race they are actually 109 and 57 respectively. Even though I knew the race distances going into it, there was a real psychological impact when I got to mile 89. My head felt like I should be nearly done, but I knew it was really another 20 miles…Uff Da! This year I went back to the 50 mile. I think I was actually in better shape this year than last year, but I wanted to ride the same event that my younger son is participating in, and it allowed me to try and push a little harder instead of just surviving.
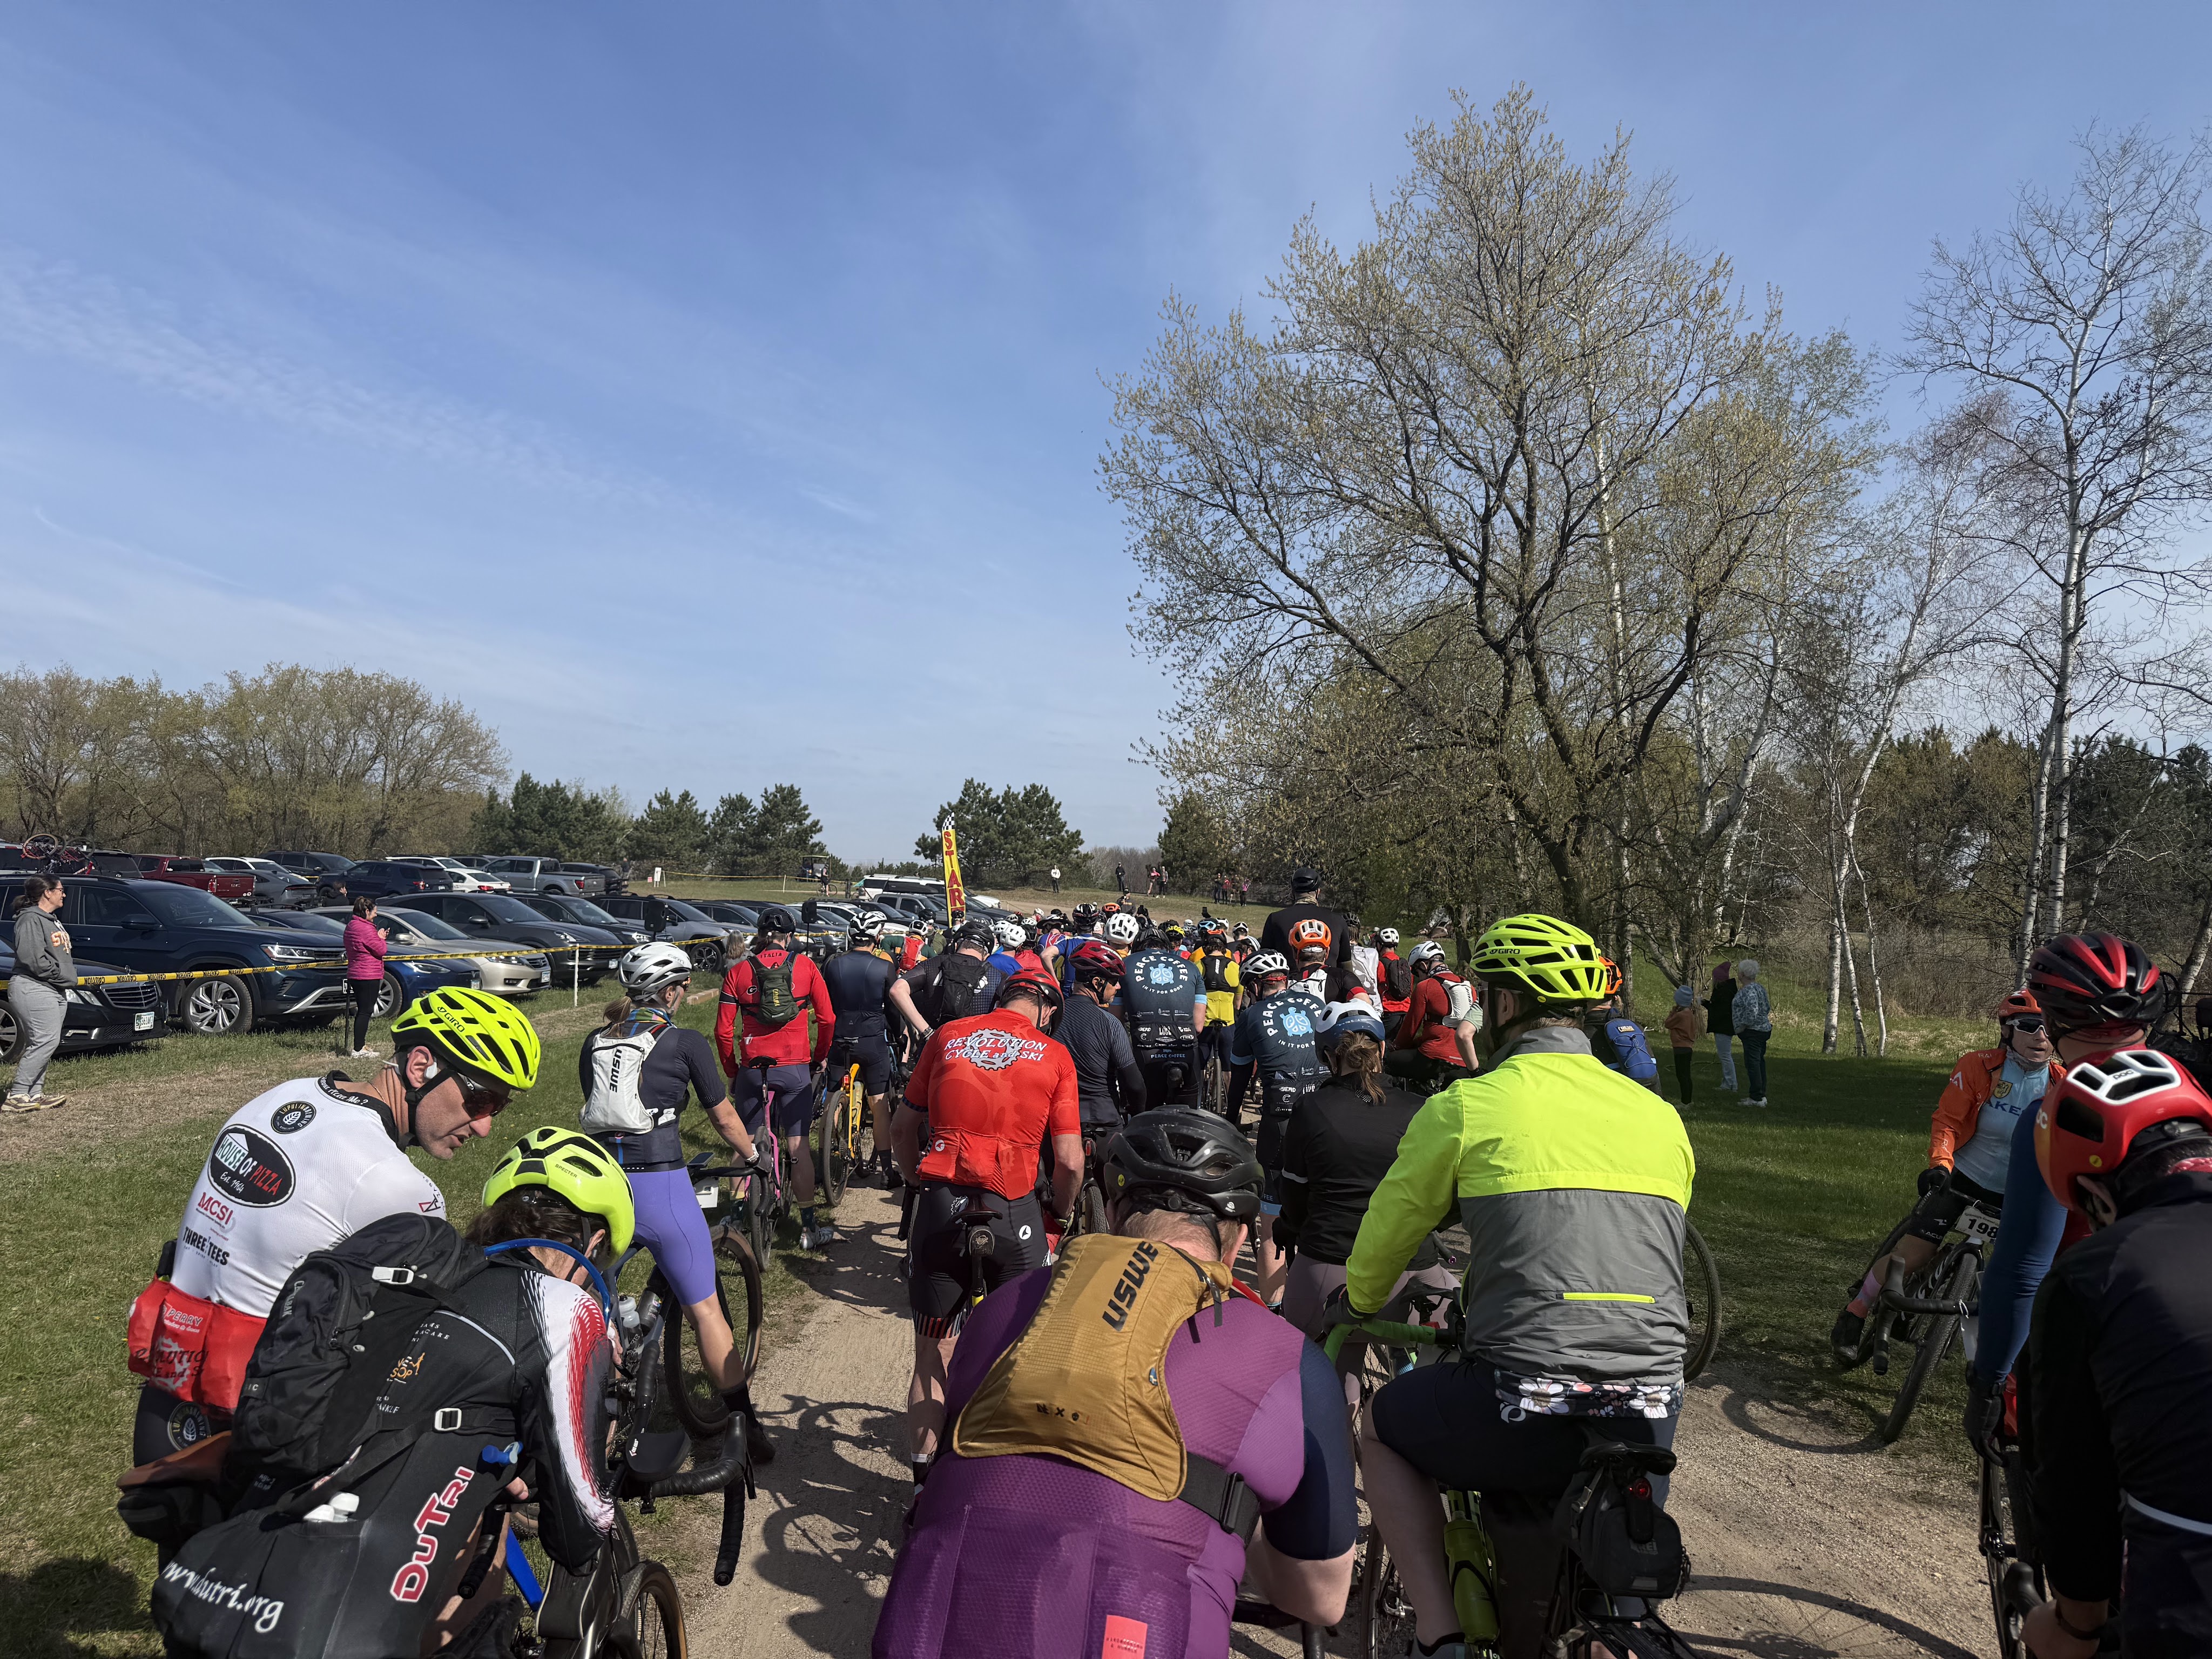
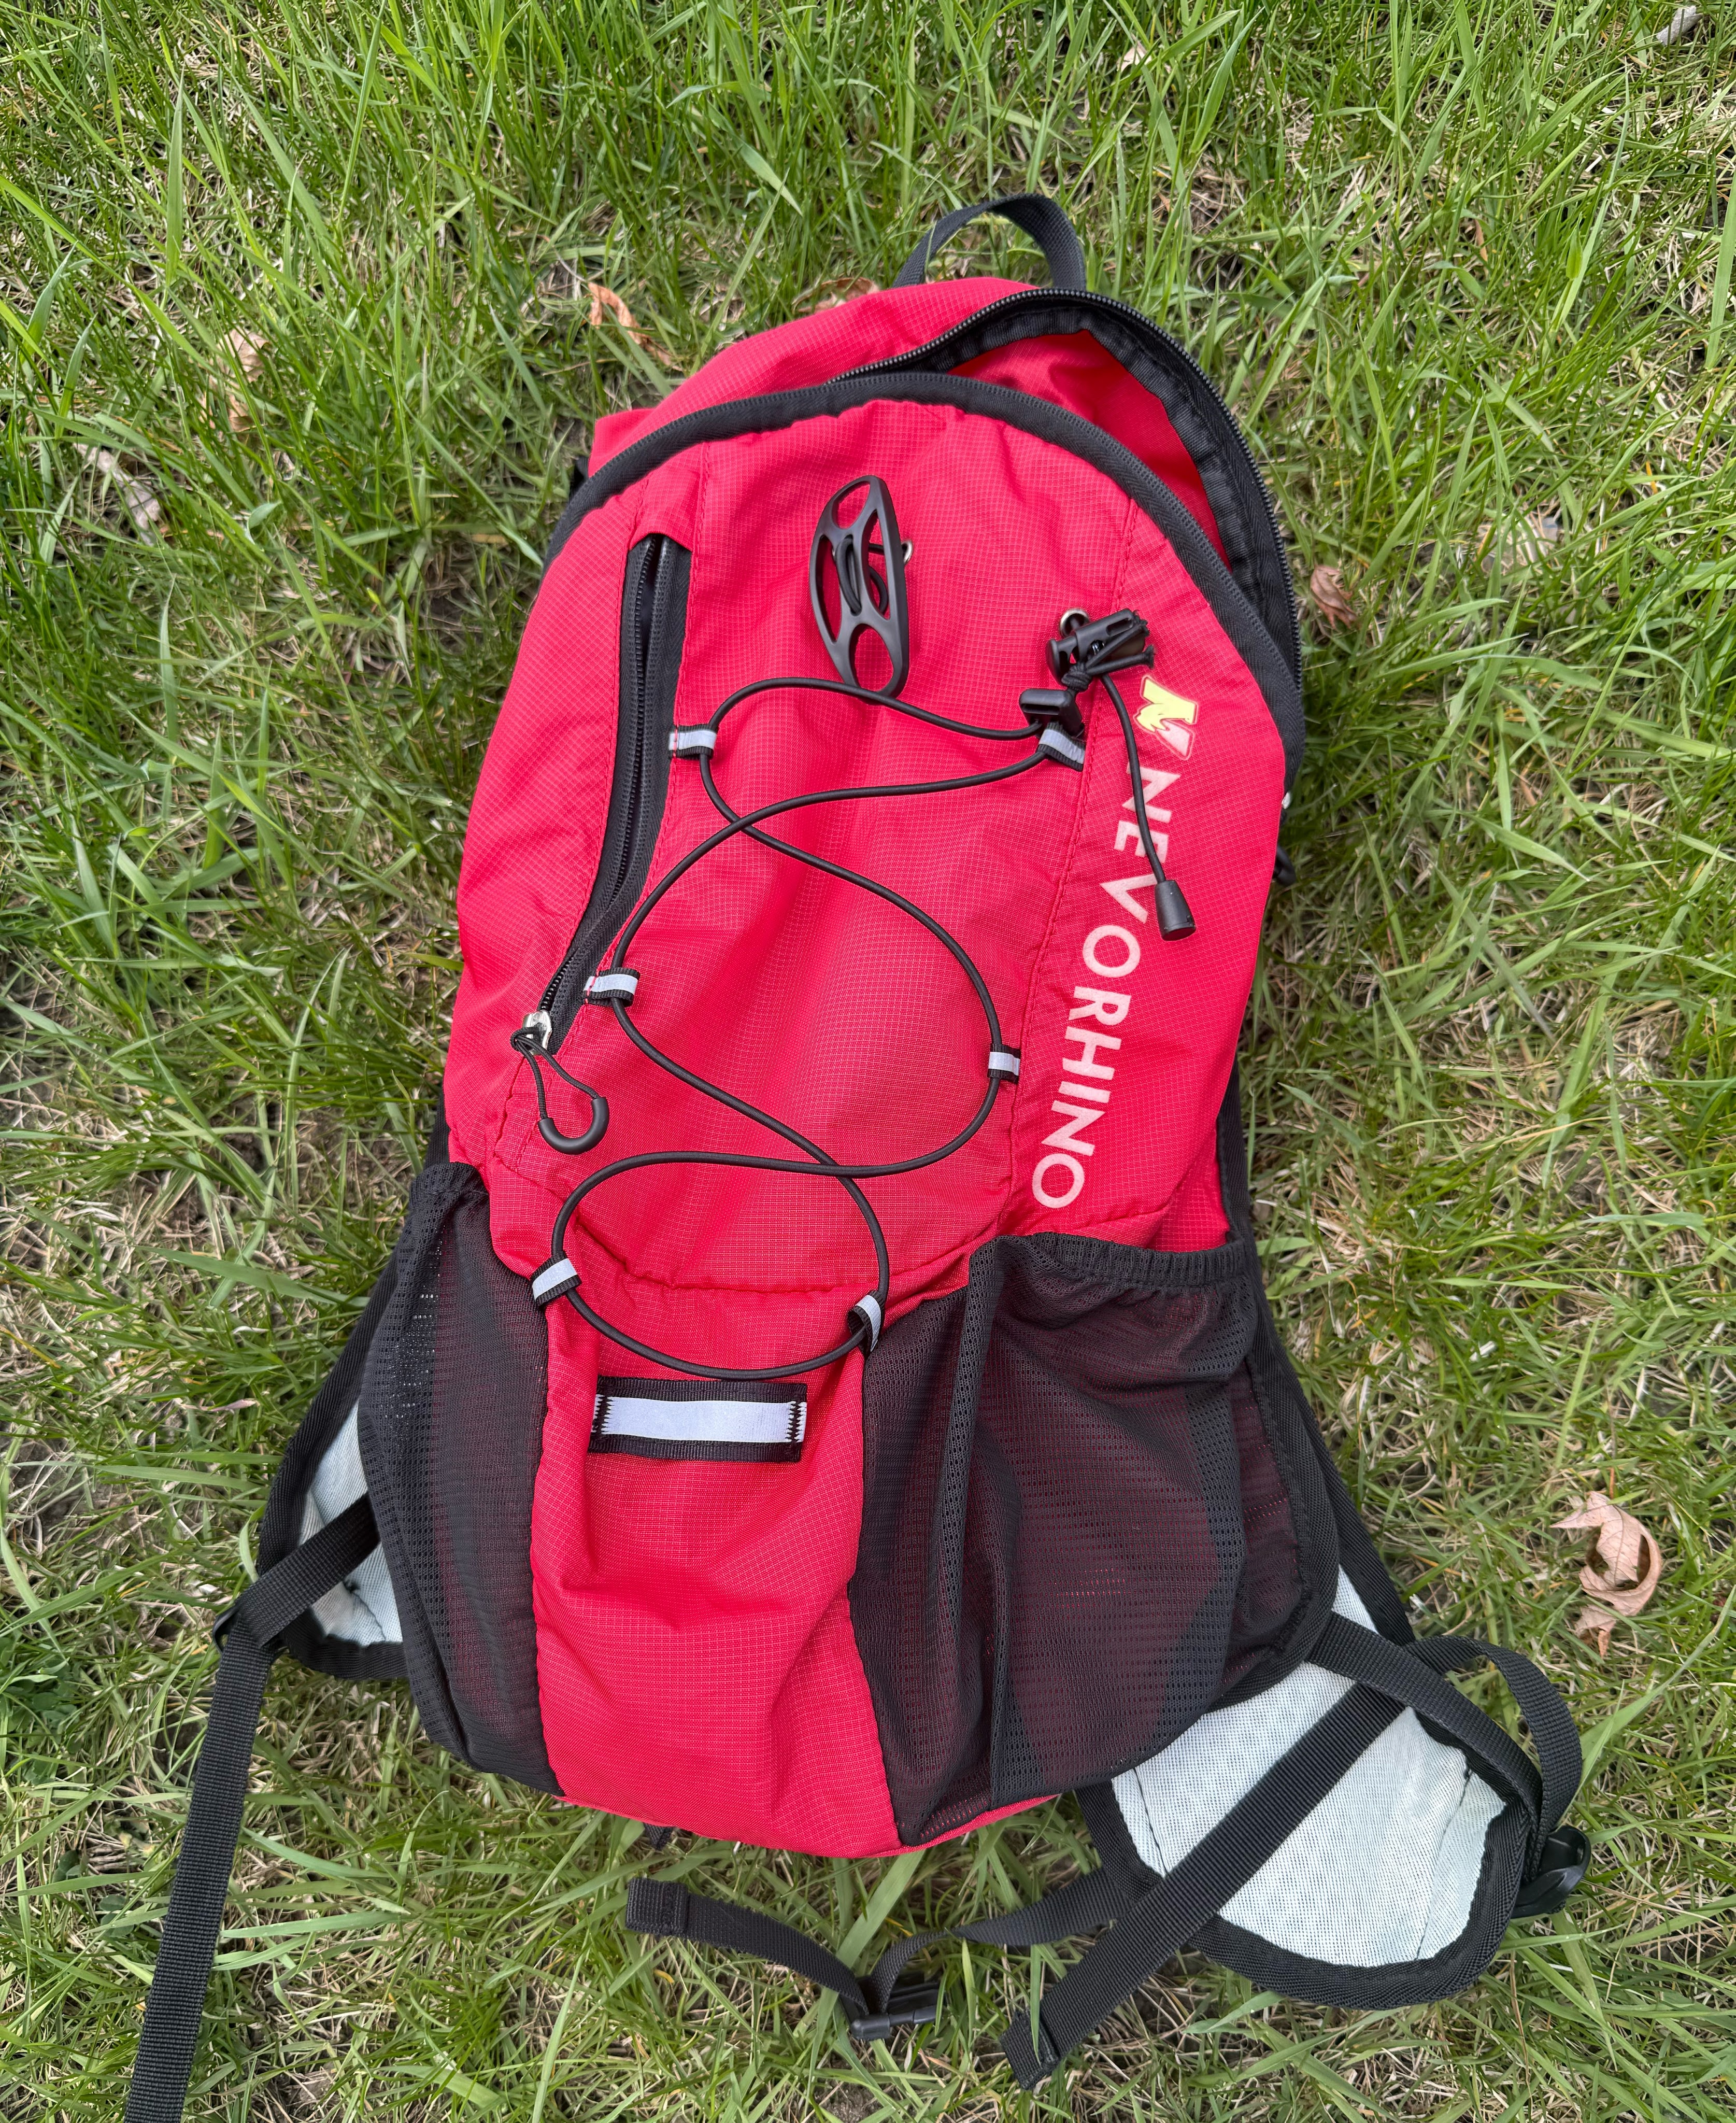
For the second year in a row the weather was perfect, starting the 50 mile race at 10 AM under sunny skies and 50 degrees with just a slight breeze. The start was sure to be fast and it didn’t disappoint. My gravel bike is a carbon frame from bikes direct that has pretty nice components on it including Shimano Ultegra groupset and hydraulic disc brakes. For tires I was running Maxxis Rambler 40mm, set up tubeless. My nutrition for this ride was a home-brew calorie and electrolyte mix that I carried in a 2-liter hydration pack. This is the hydration pack that I have used for a few years now, it is inexpensive, but it is light, and has been on thousands of miles with me. I’ve used this pack for 3 granny’s, one Lutsen 99er, two Chequamegon’s and much of the training. You can see from the picture it is still in great shape, although I did just wash it. The only thing I changed was swapping the bladder that came with it for a Nathan bladder and hose which are more supple and user friendly. There is plenty of room for a light jacket, spare tubes, snacks and more. The following are affiliate links. If you click and purchase I may receive a commission at no cost to you, but rest assured I would not endorse a product or brand that I don’t use myself.
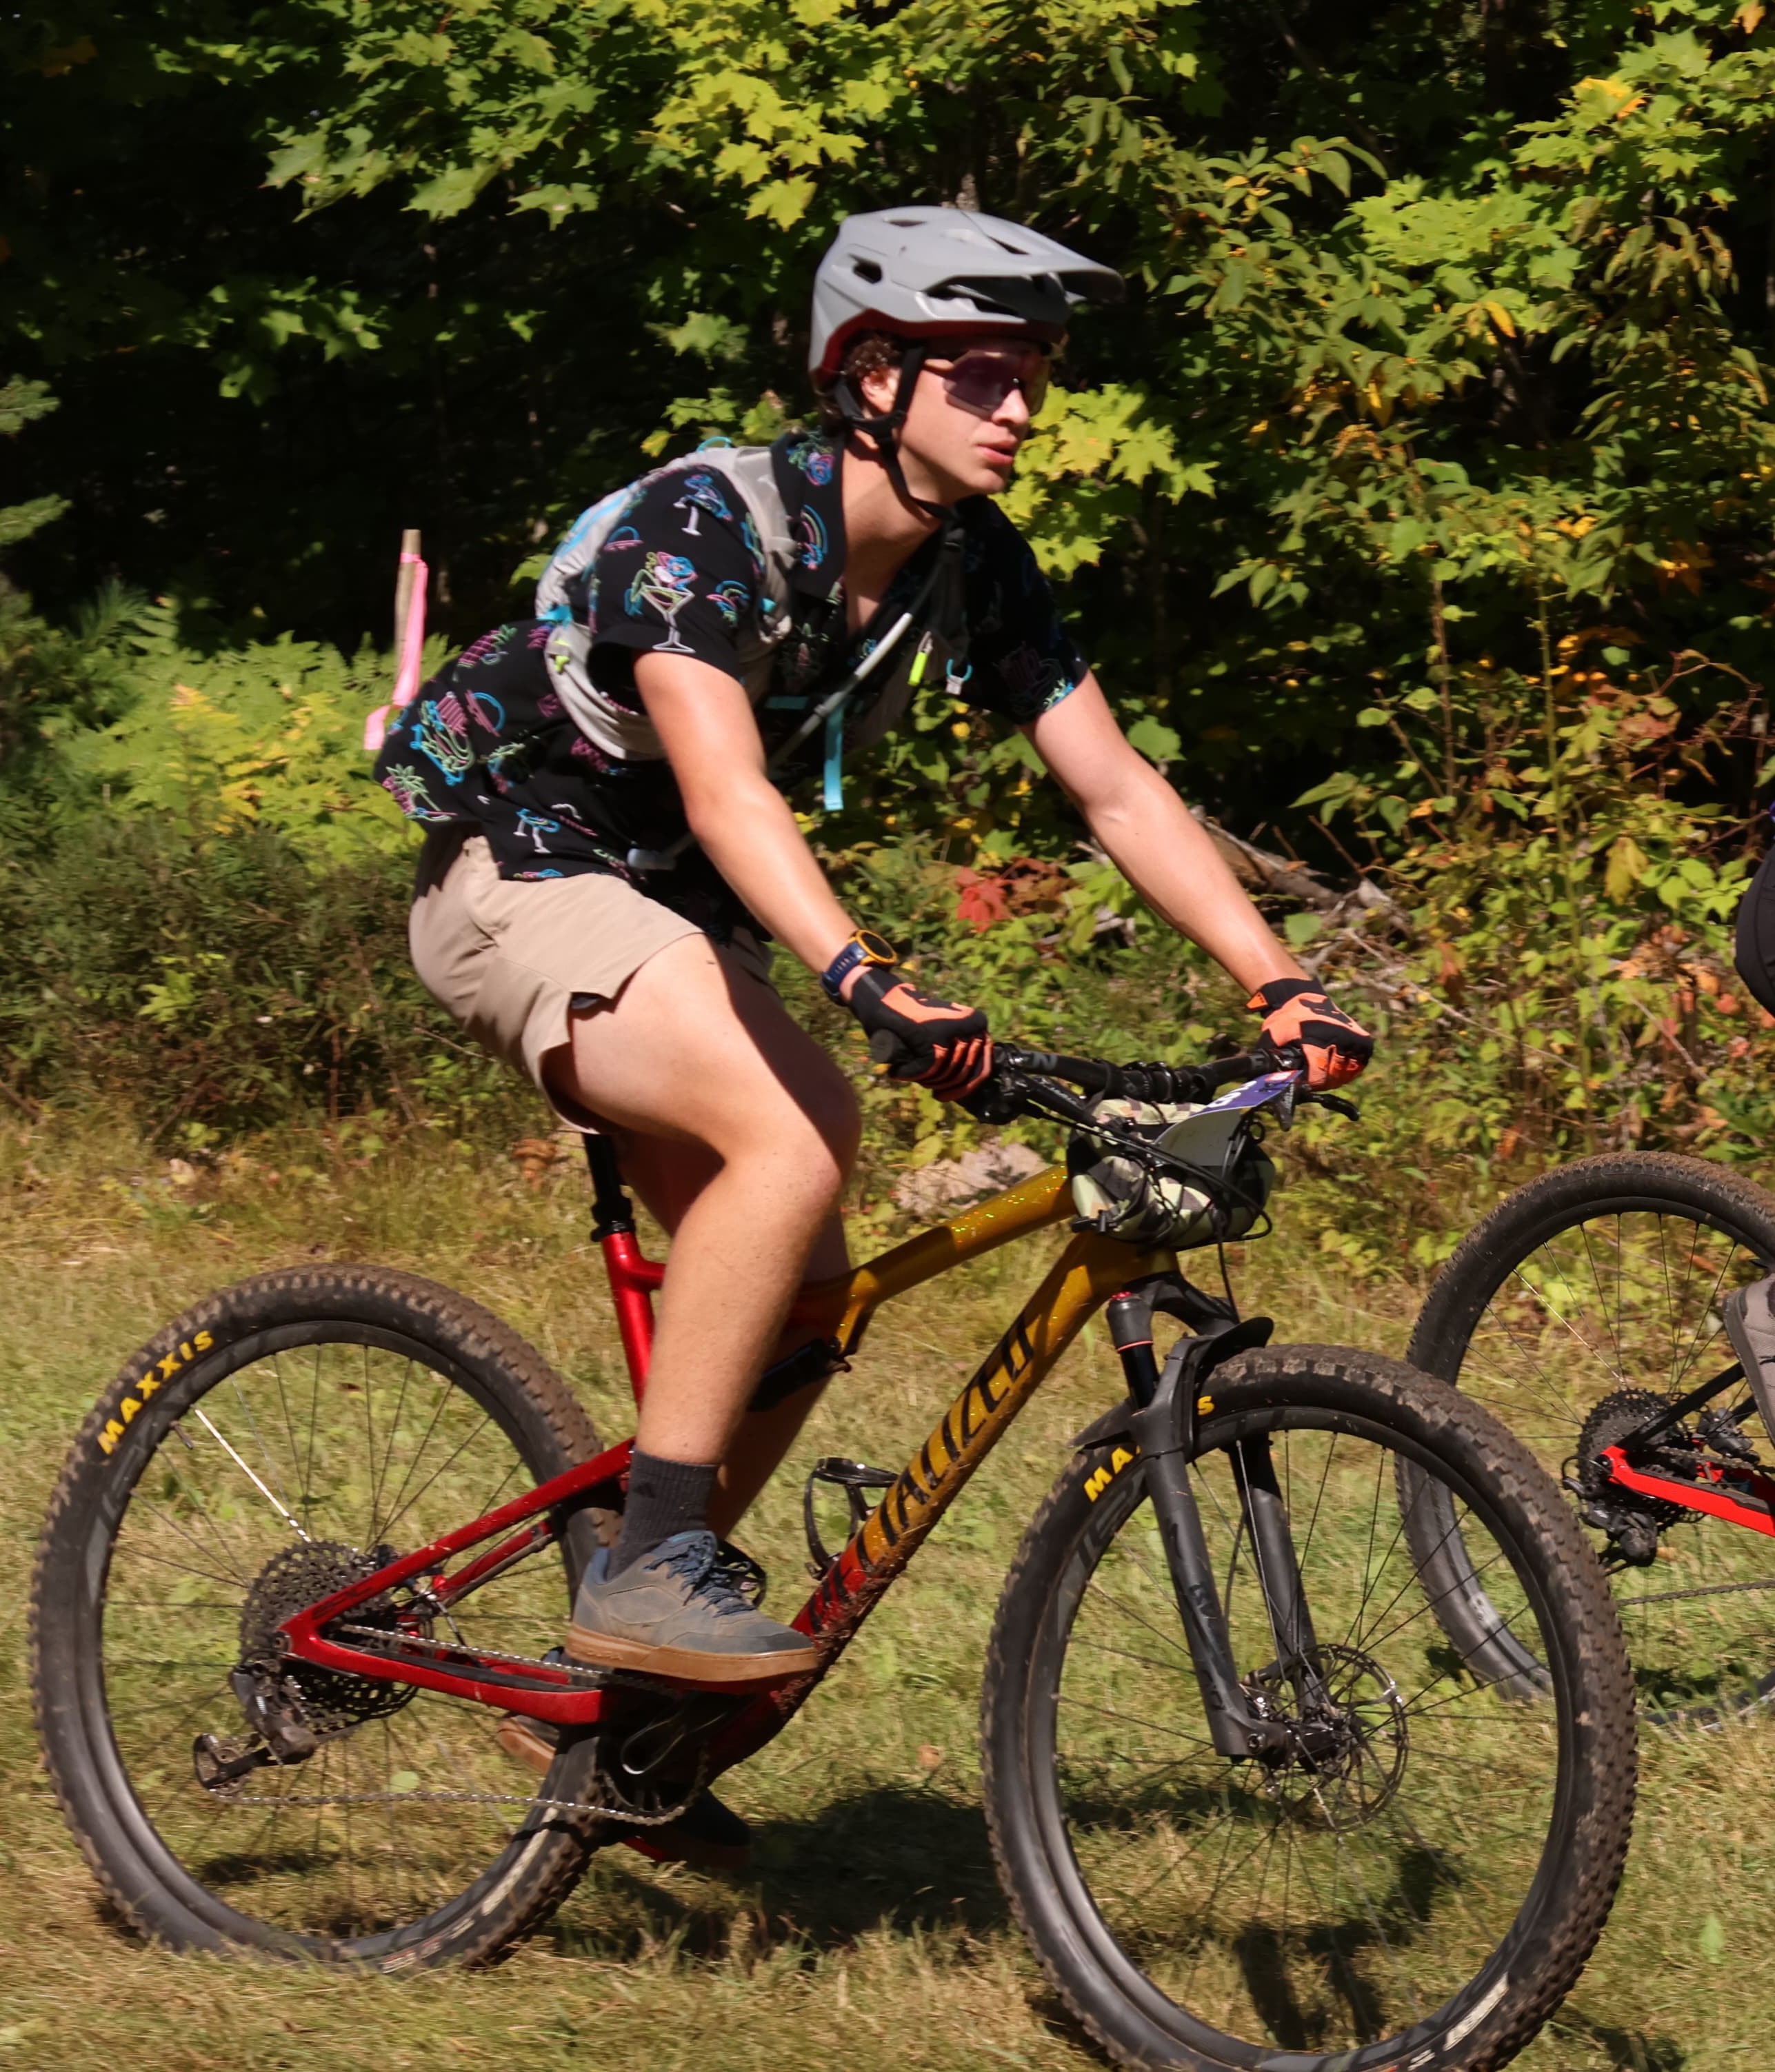
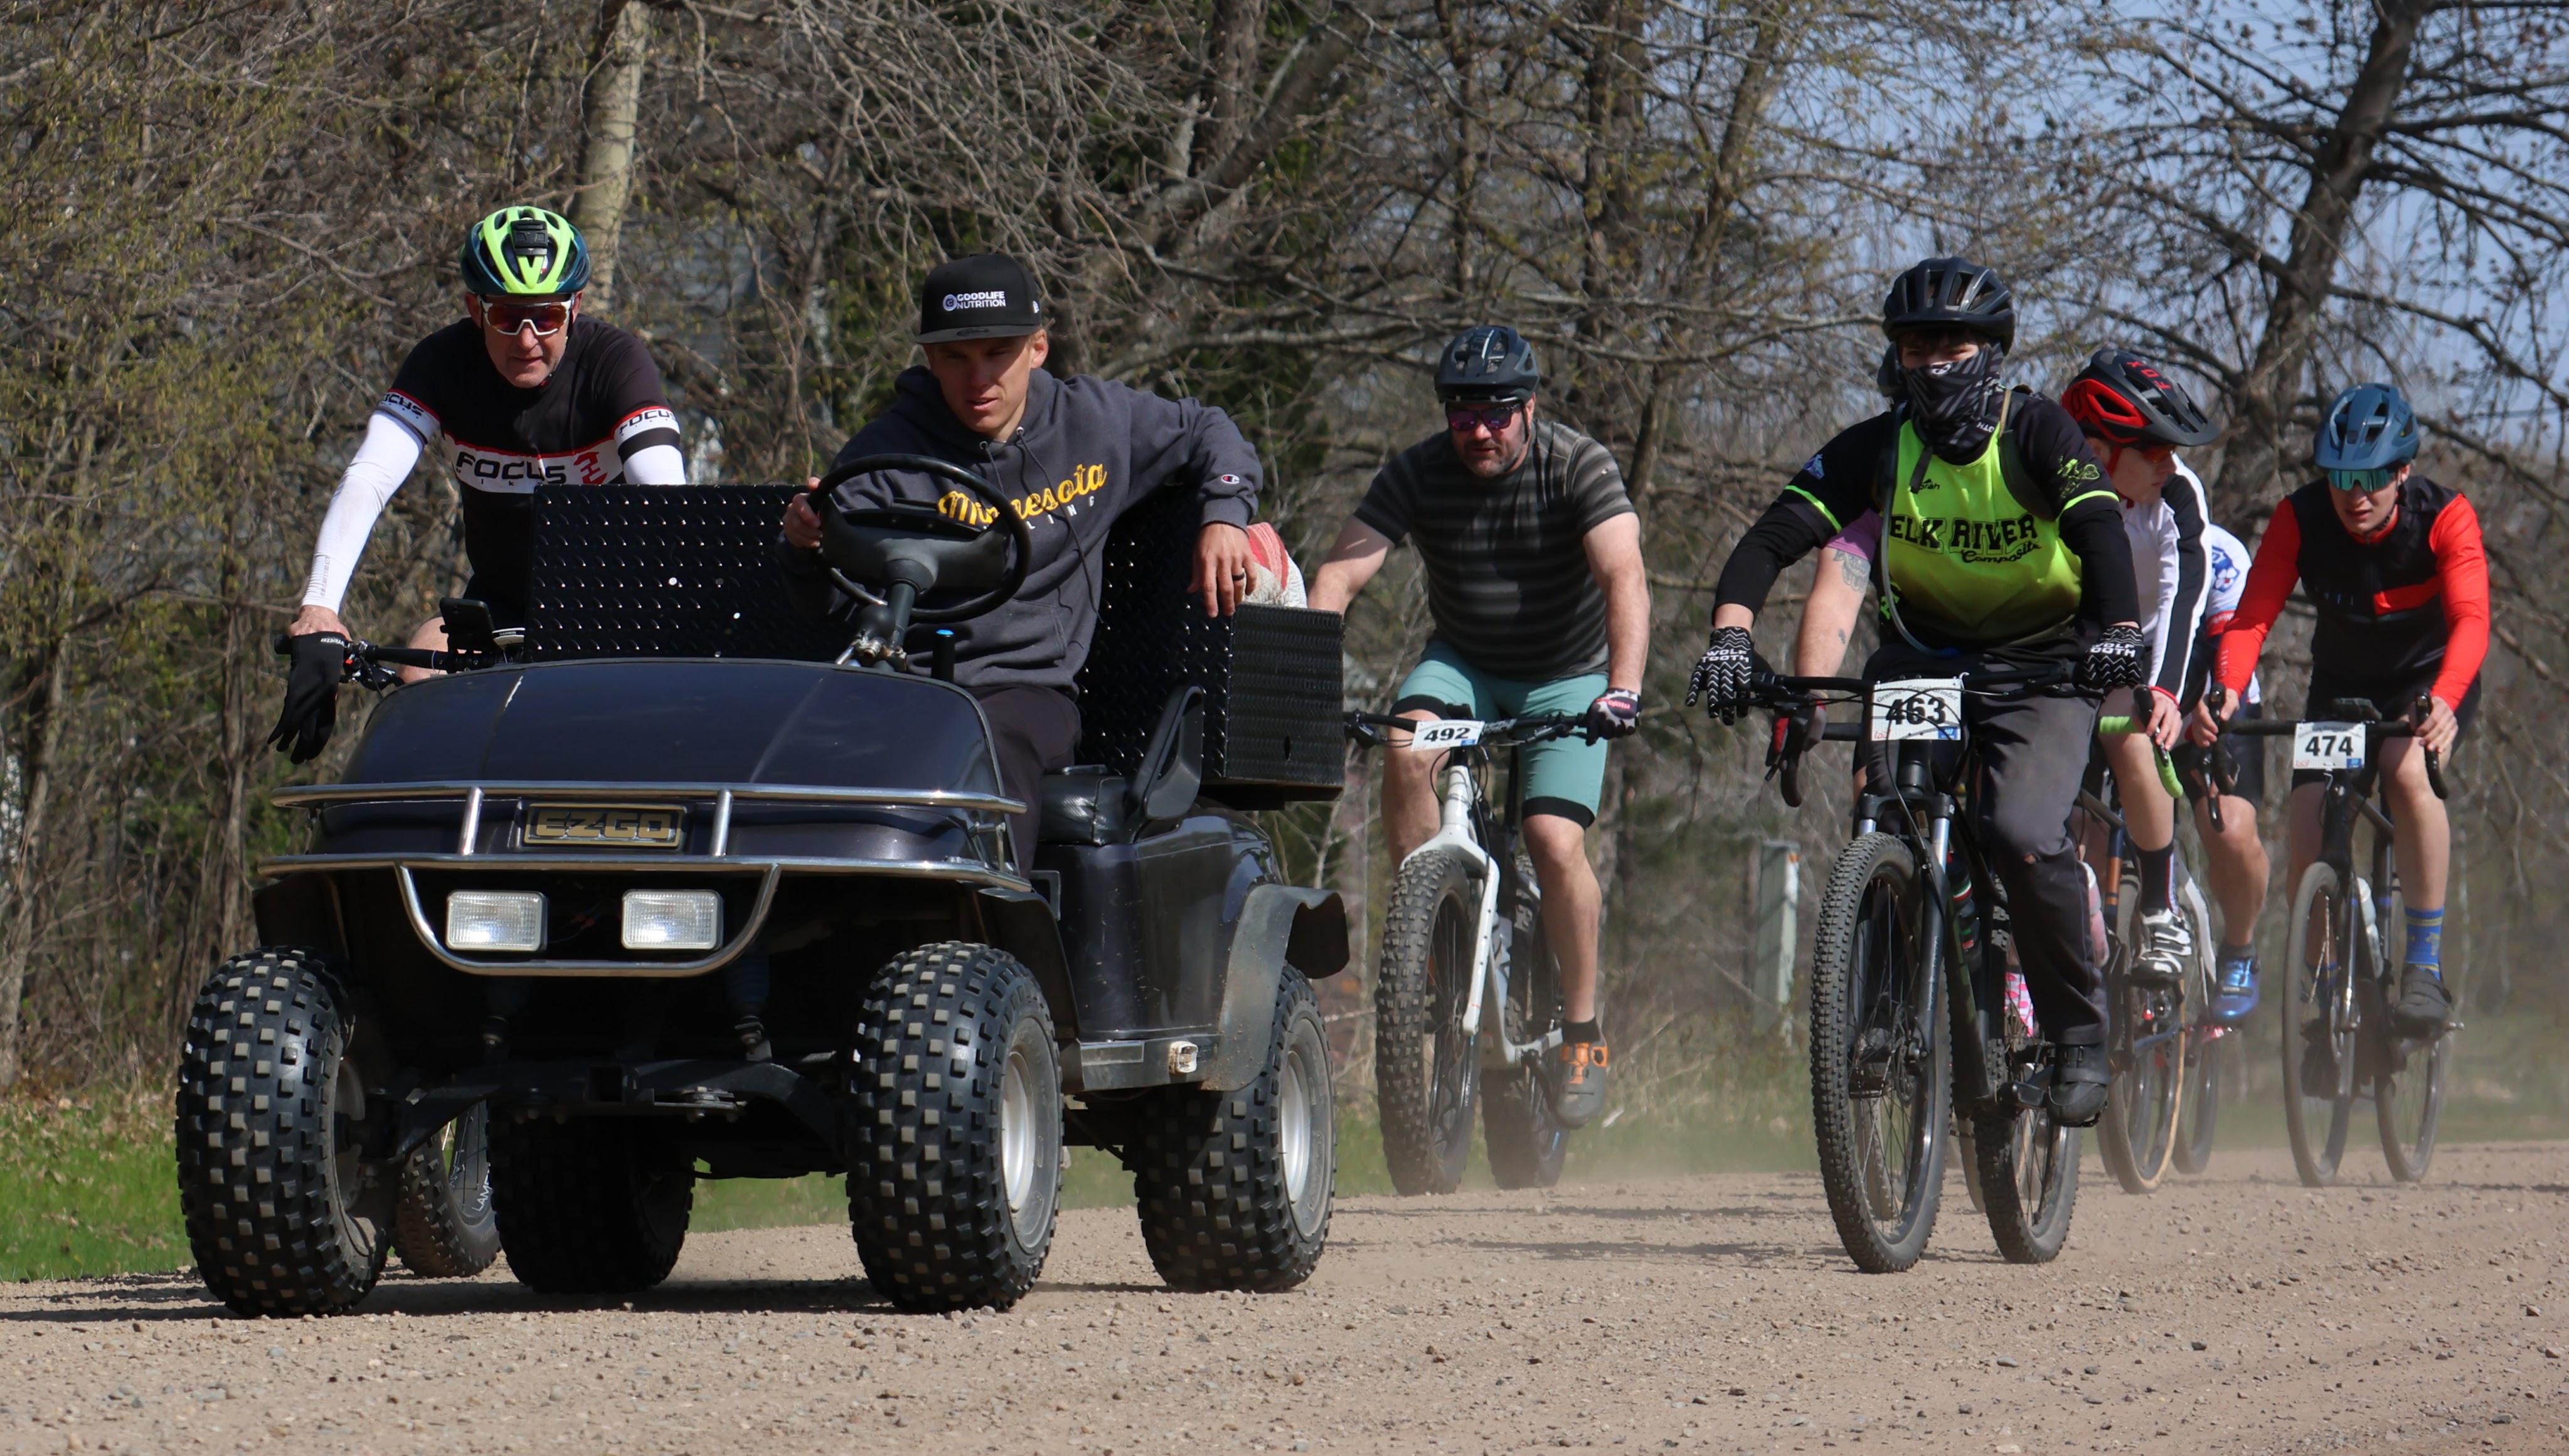
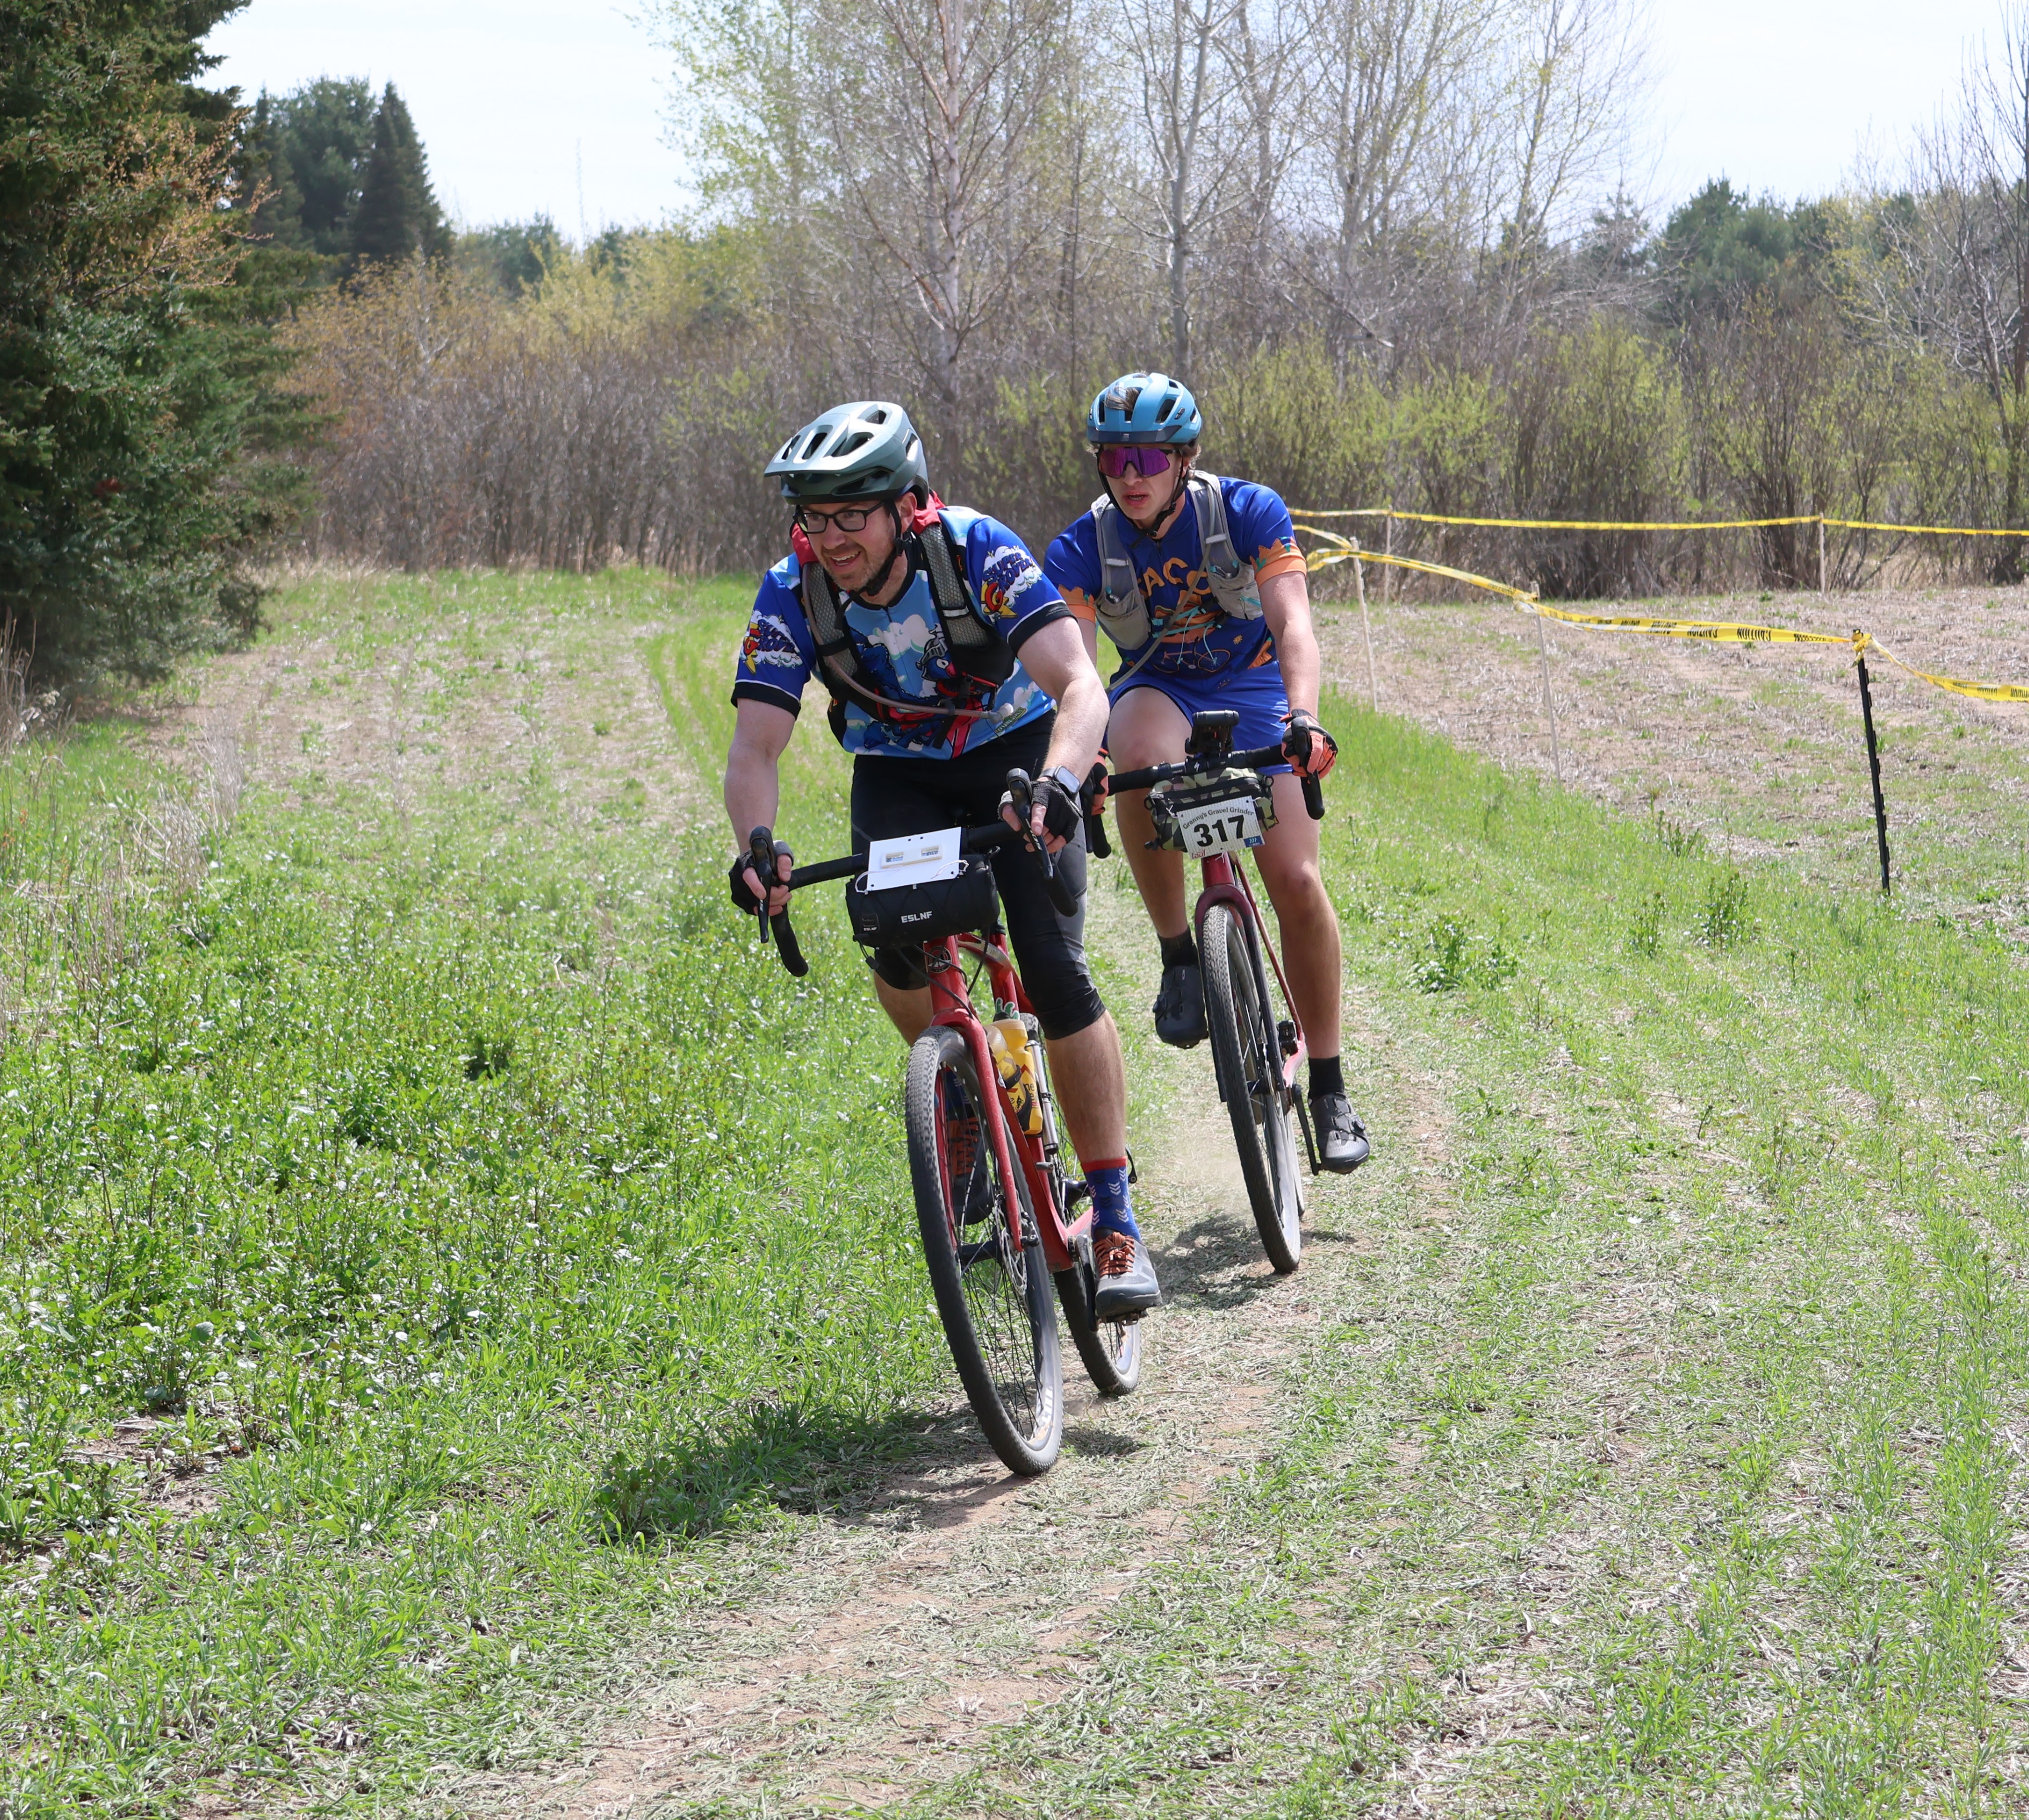
My 15 year old and I planned to ride together with a goal of holding 16 mph. To this end we were doing quite well, keeping each other in check, taking turns when we lost a group and making sure we were having a good time. For the 50 miler, there is one aid station at about the 34 mile mark, which is set up at Jitters coffee shop in Ogilve, MN. Like always the aid station provided something for everyone; chips, drinks, pickles, fruit snacks, and much more. Our nutrition and hydration were on point, bodies feeling good and ready to go…until we left the aid station. As we pulled away and headed south, the wind hit like a ton of bricks. On top of legs that were maybe a little more tired than we realized, our pace slowed to about 14 mph. We would continue to battle the wind for the rest of the race, with our bodies going through the ebbs and flows of an endurance event. Although this is a gravel event, there are a few small sections of blacktop and I would be lying if I didn’t find a bit of relief when on the blacktop sections. It’s amazing what a difference it makes in speed and effort when going from loose gravel to blacktop! We continued to grind through the race and eventually one of us had to make a move. Before the race, my son and I decided we would race it together but the finish line is up for grabs. With about a half mile to go, I went for it, making the final turn through the pasture (yes the final stretch is through a field). I thought I was in the driver’s seat, when on the final corner, he shot past me and I had no answer. Fortunately in the picture below I was still in the lead!
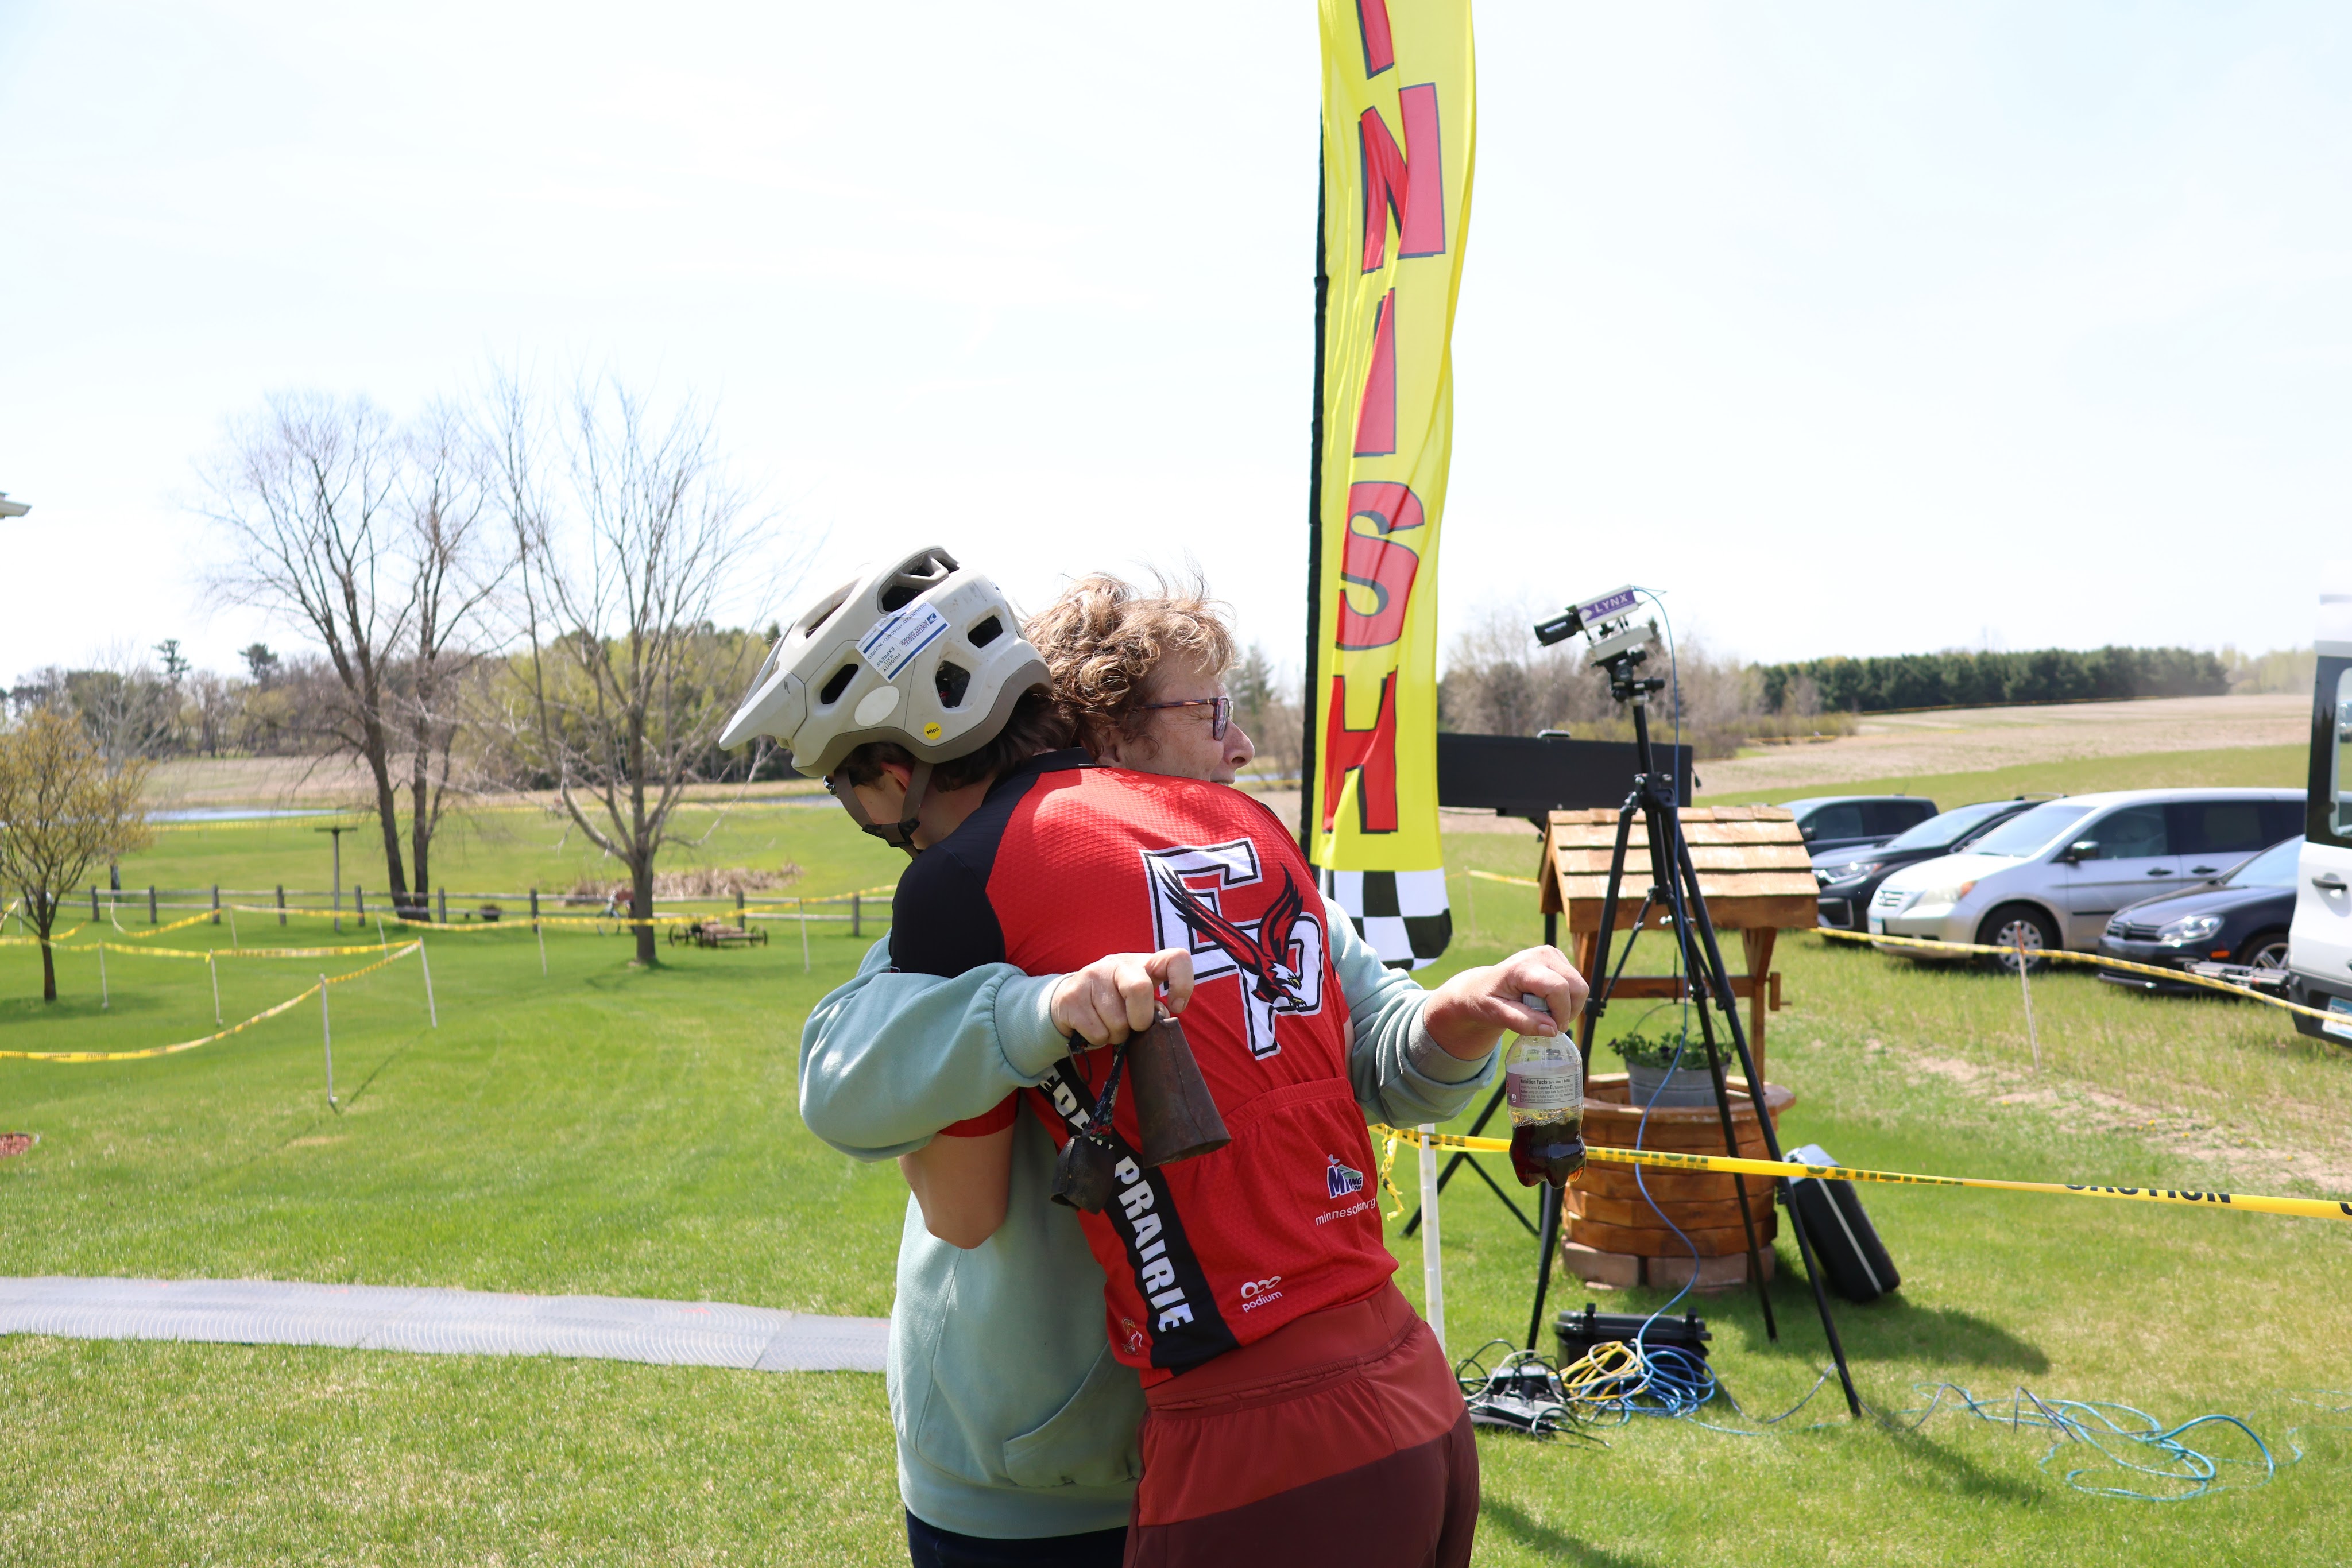
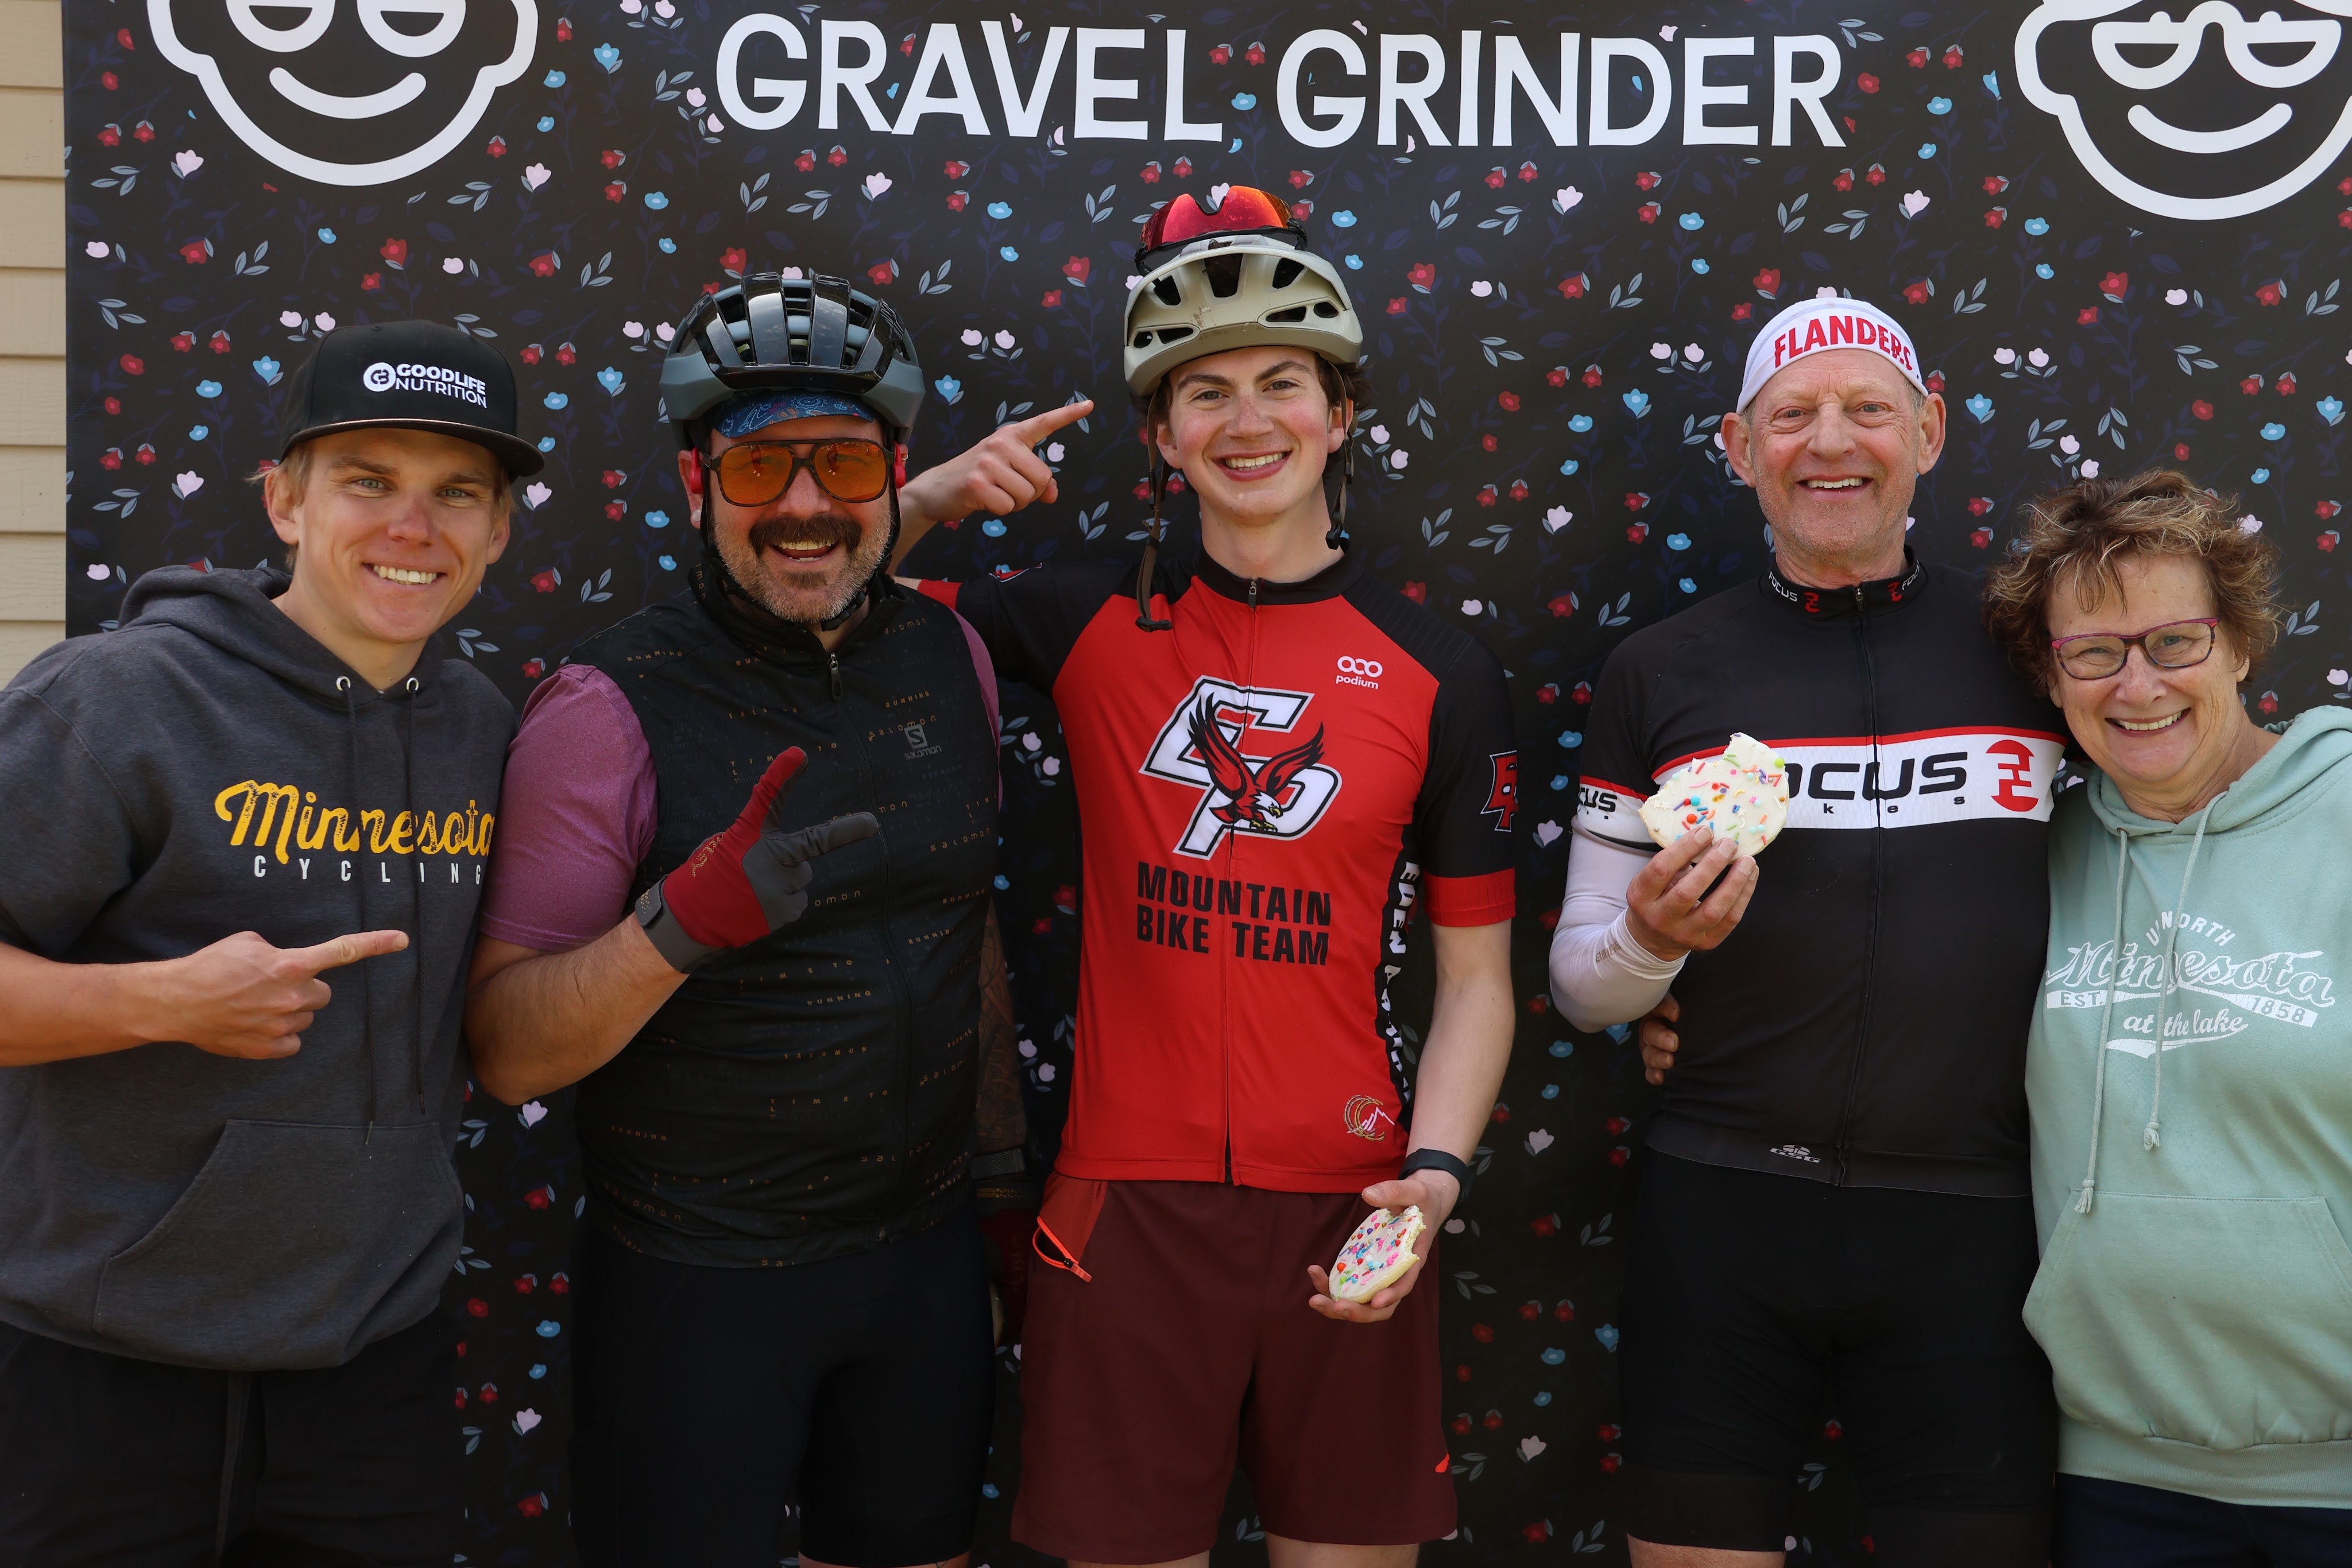
It was a great day and a great finish, made better knowing that tacos and root beer floats waited for us. I should also mention that my older son, who was originally planning on doing the 100 mile race went down to the 25 mile since he is in the middle of track season and also nursing some calf tightness. He was planning on taking it chill and just following the crowd through the 25 mile course. His plans changed when he found himself in the lead, but kept taking wrong turns since there was nobody to follow. A mid-race Strava purchase set him on course and he won the 25 mile race despite the several wrong turns. I joked with him if he won a new bike, his response was; “no, a big cookie” and of course a hug from Granny! Which is the way it should be for events like this. Thanks again Chase, Granny, and the whole family!
In Minnesota the transition months can be tough for the silent sport enthusiast. What is a transition month? I consider them to be April and November, although it could bleed into May or start early in October. This is the time period where the Nordic ski season is over or hasn’t yet begun, but the weather is pretty cold for riding. In the spring, the single track trails likely won’t be open on a consistent basis due to rain and freeze/thaw conditions. This doesn’t mean we stop biking, we just need to prepare.
I tend to have cold hands, especially when riding in cool weather. In the past I have tried many different glove and mitten combinations but I wasn’t satisfied with any of them. Thin gloves provide the dexterity but lack the warmth, thick gloves are clumsy, and mittens are better but make shifting challenging. I finally made the decision to try over the handlebar covers and boy am I glad that I did.
One quick note, this post contains affiliate links. If you click and purchase I may receive a commission at no cost to you, but rest assured I would not endorse a product or brand that I don’t use myself.
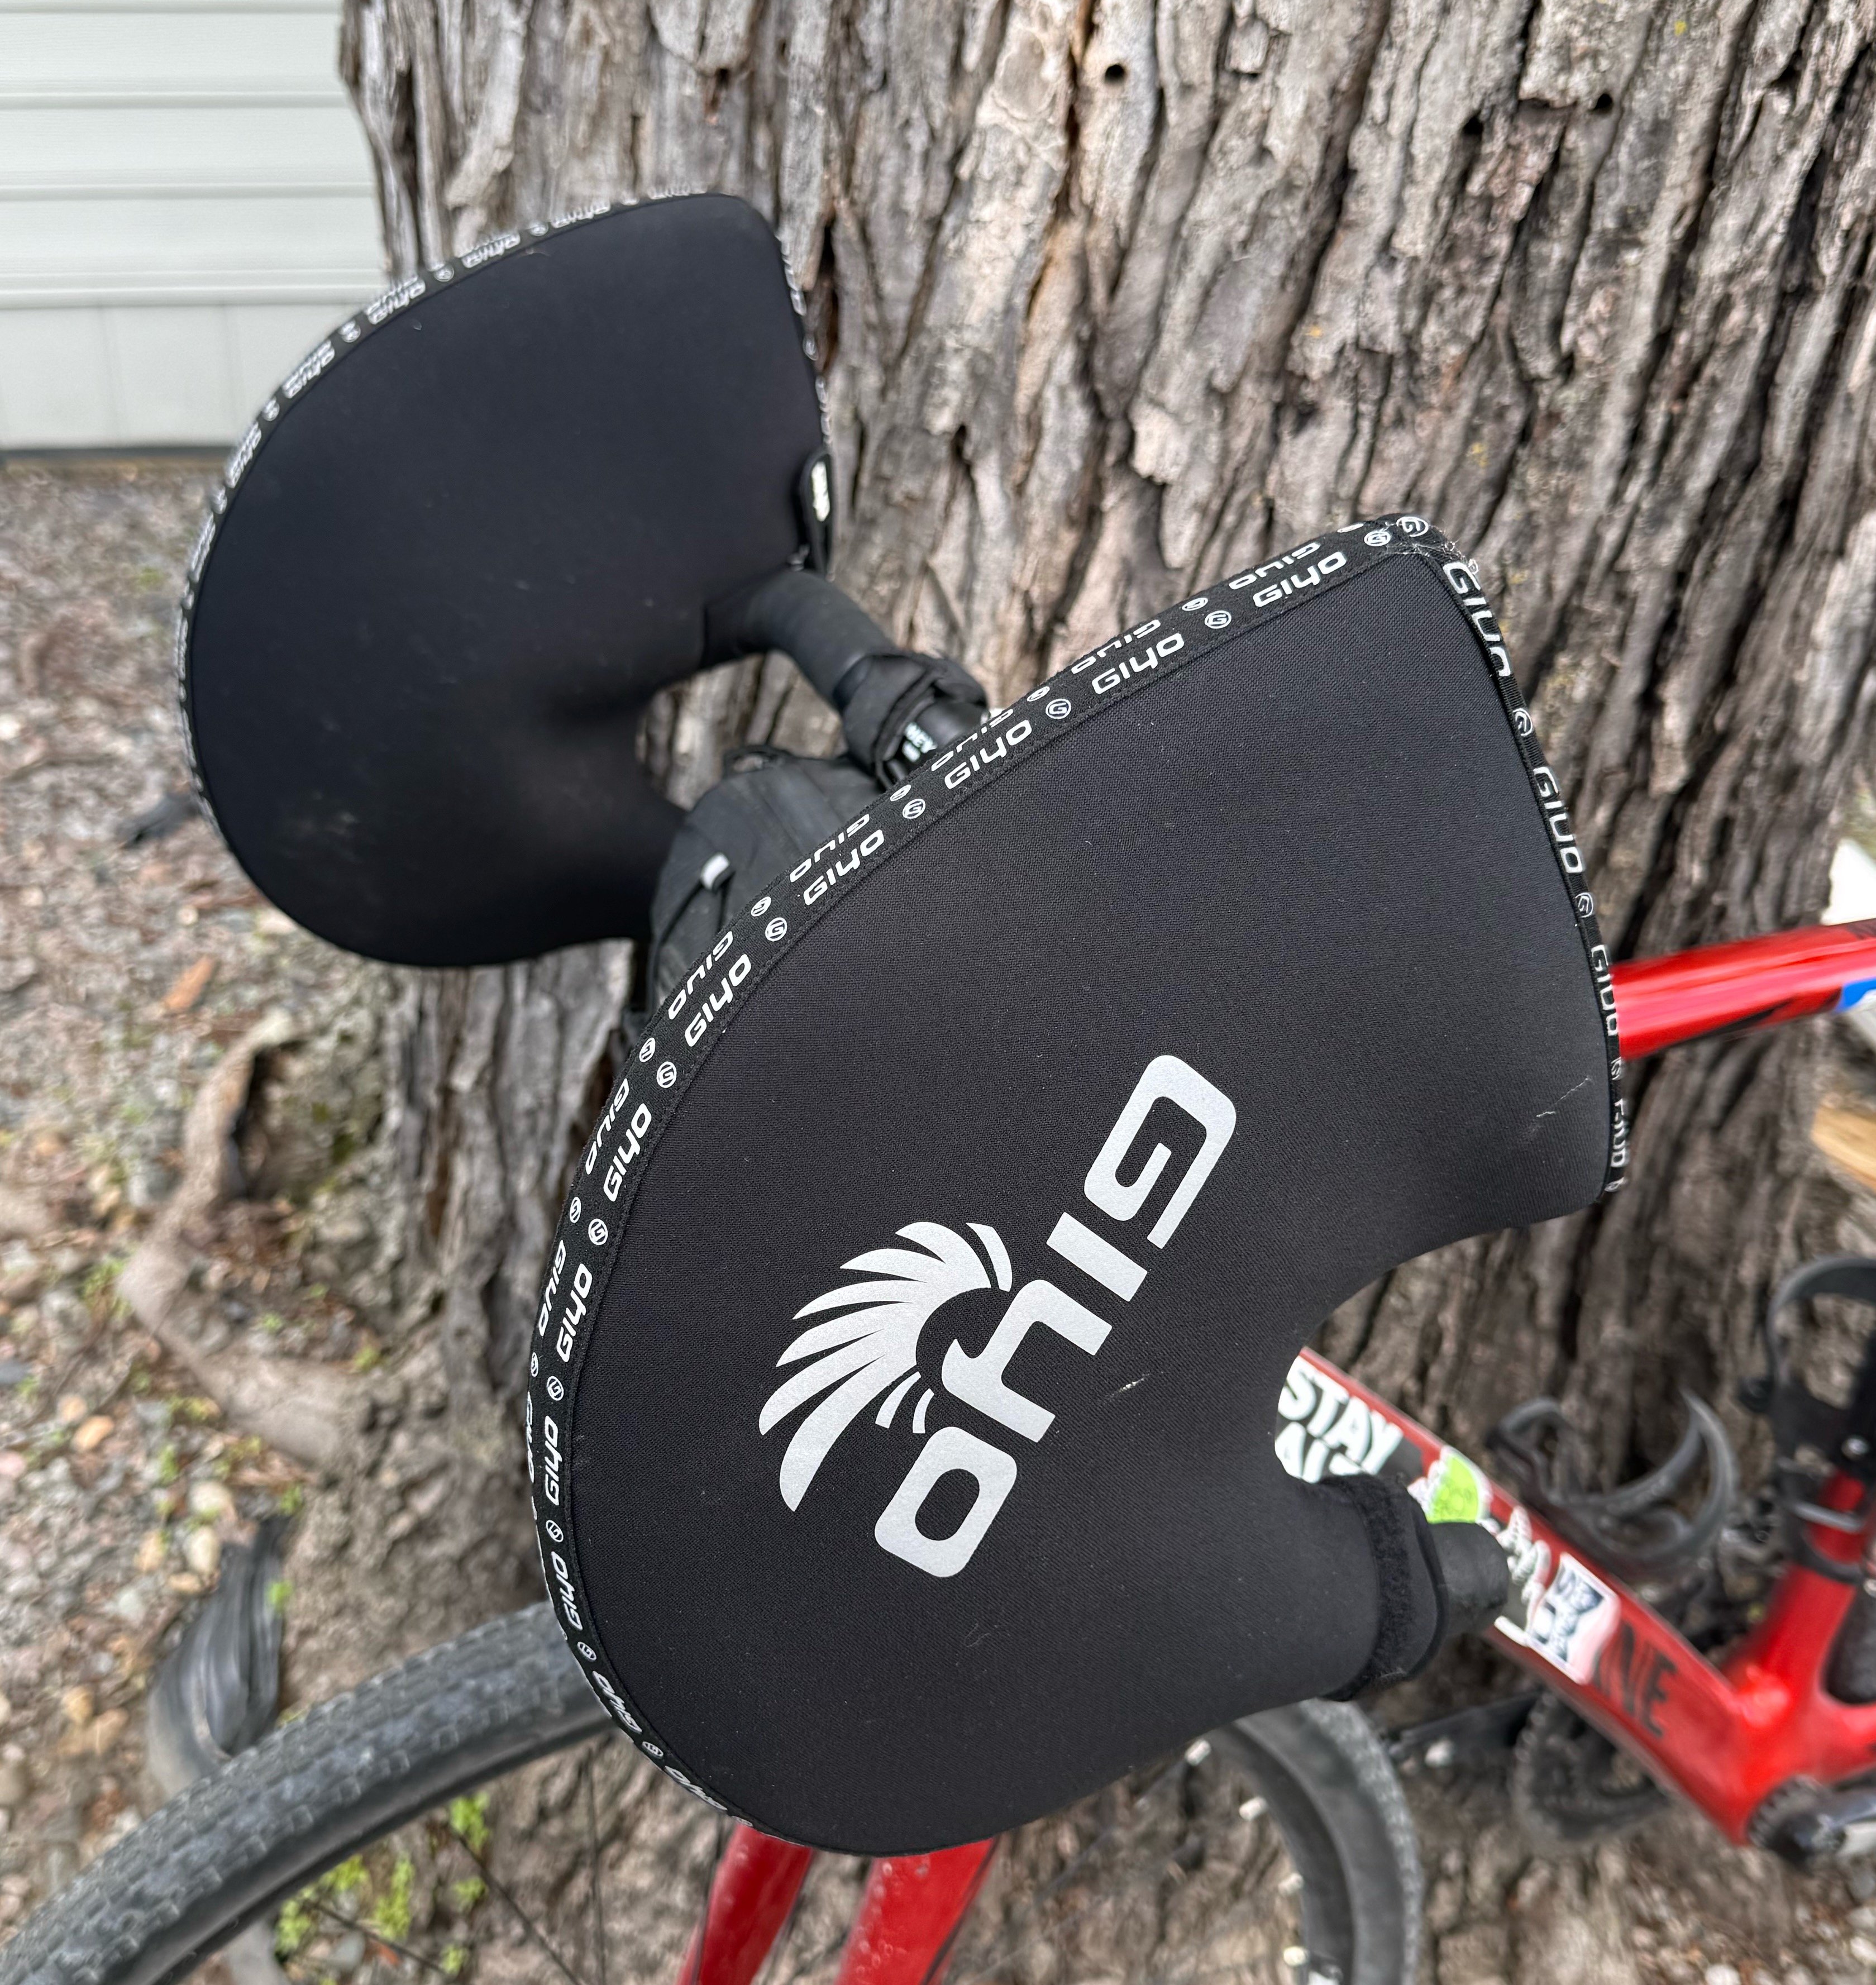
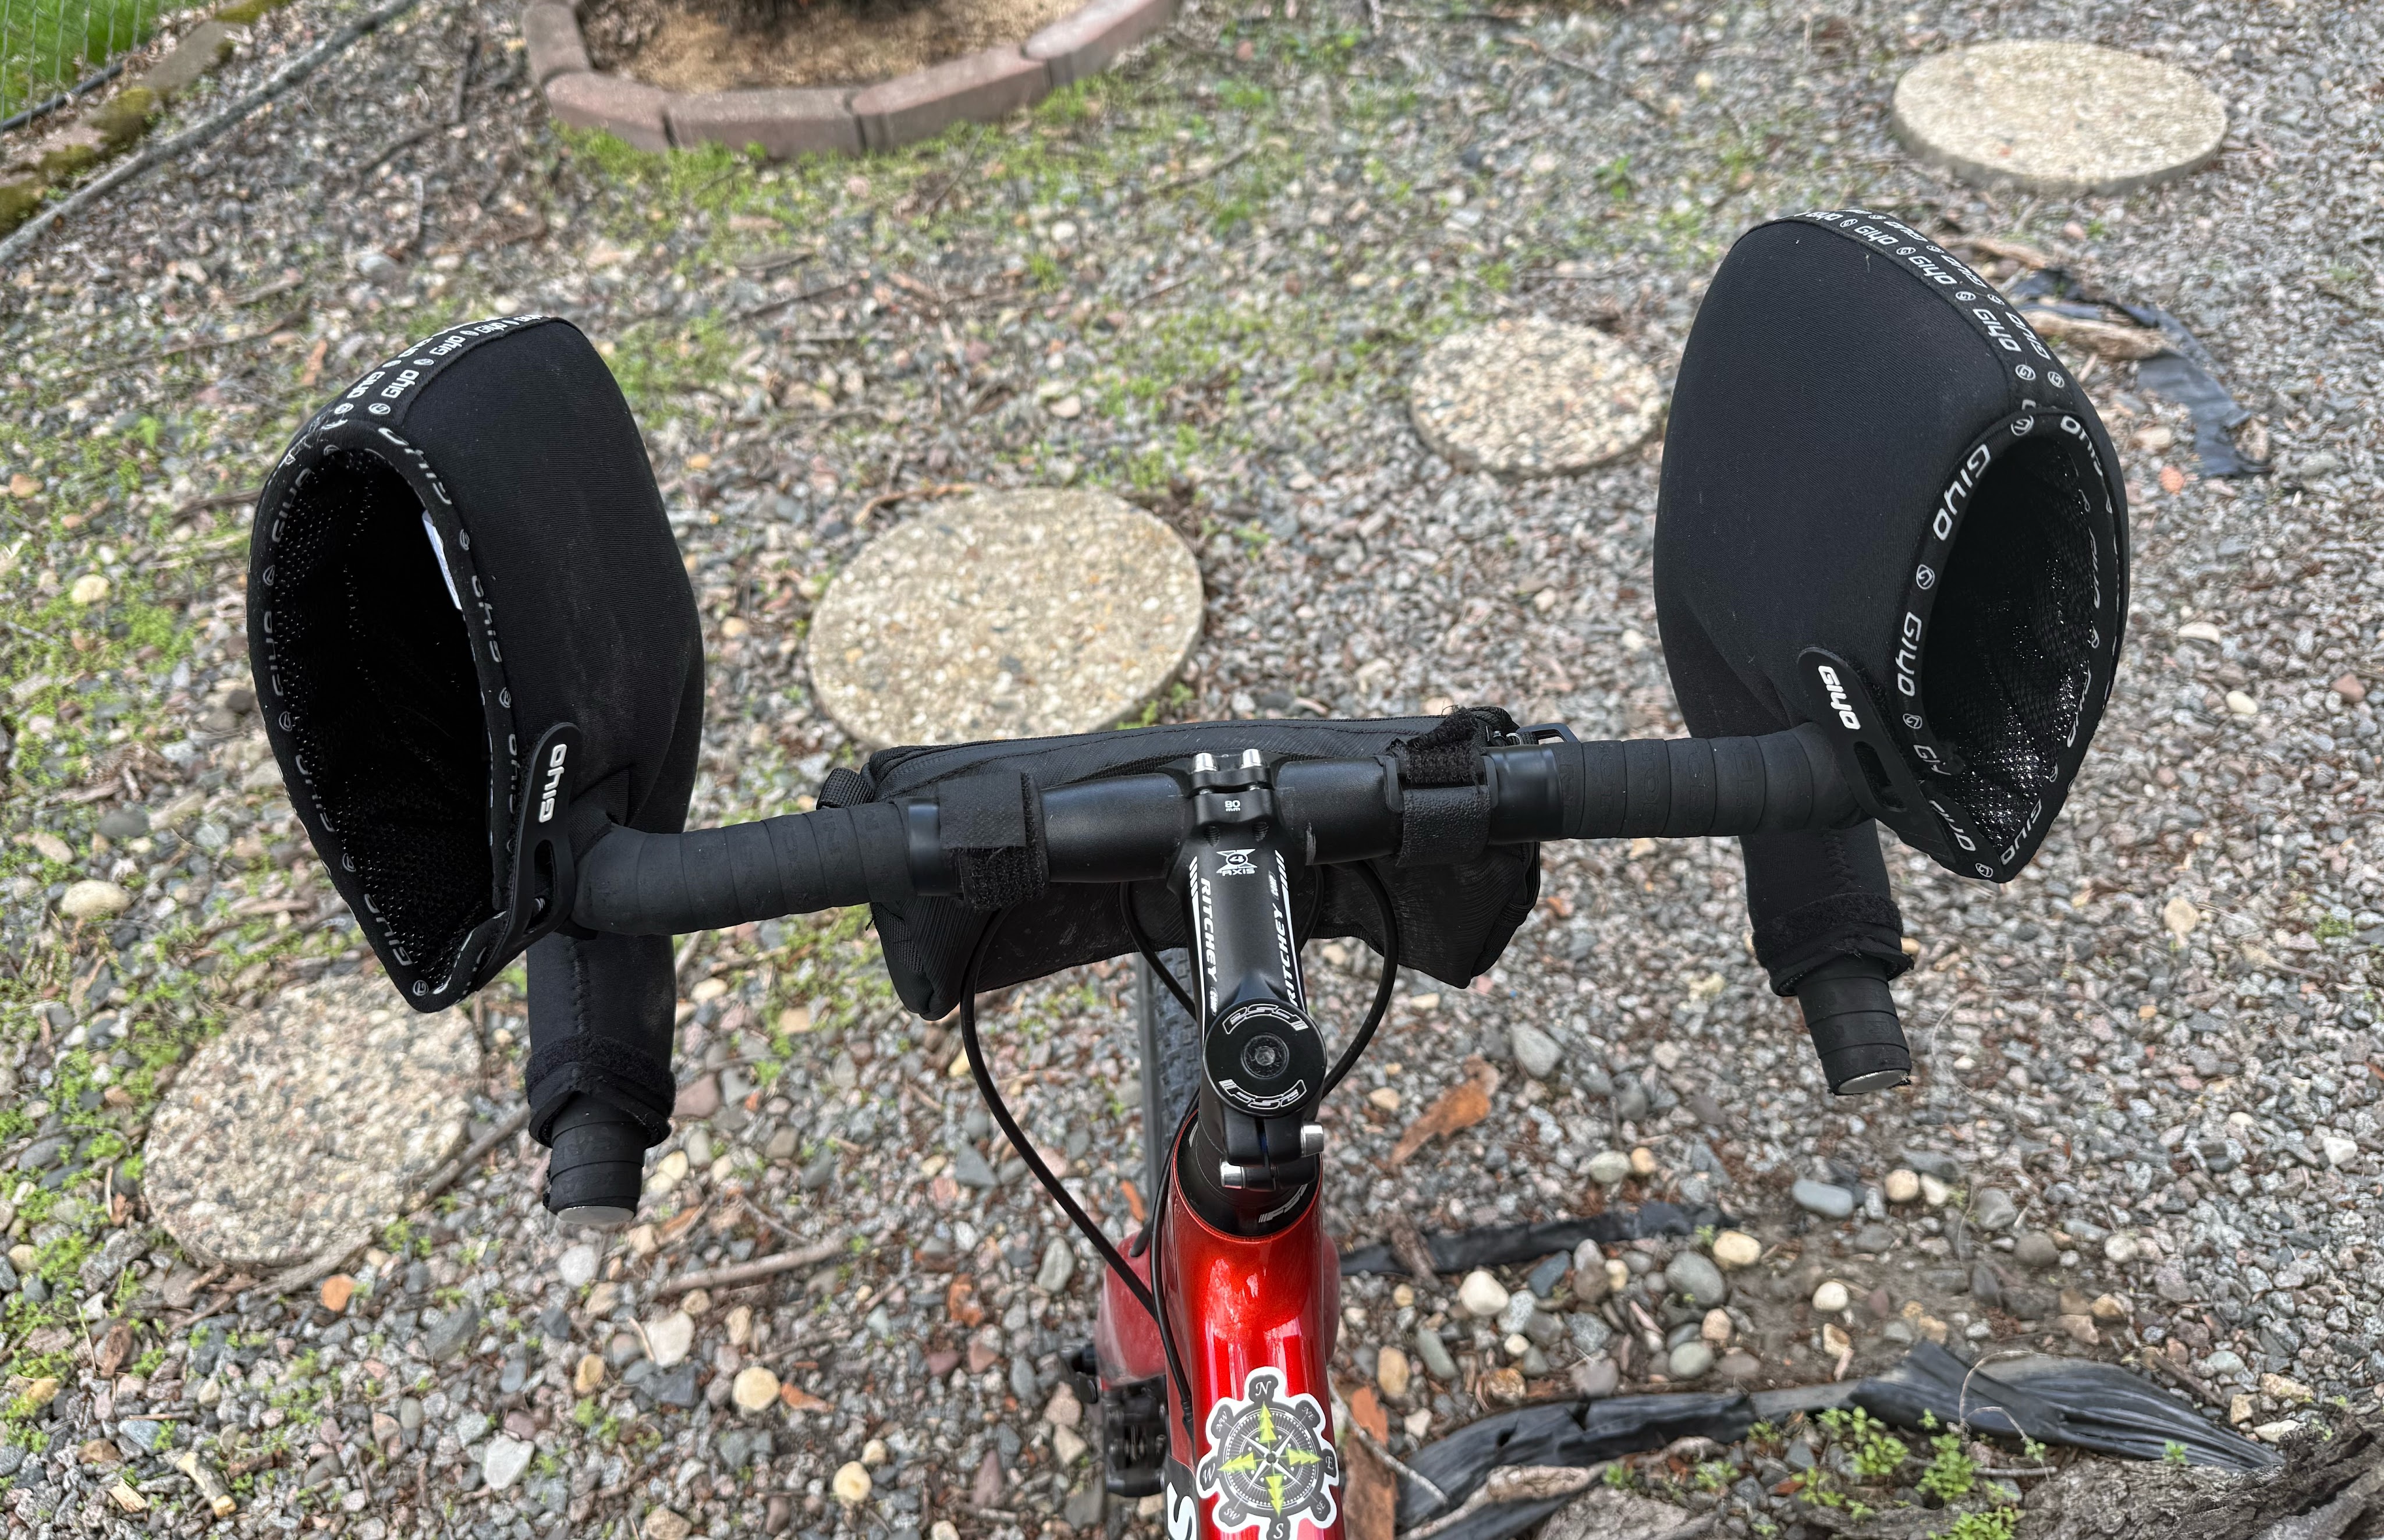
I purchased two types of handle bar covers, one set for a road bike with drop bars and another for flat handlebars, and I’ll discuss them separately. First up is the drop bar covers. This pair is made of neoprene and slides on from the bar end. Installation only takes a few moments. One note on installation: my drop bars have no flare and these installed just fine, however, I could see that the fit might be different with drop bars that were flared. Unfortunately, I don’t have a bike with flared bars to try these on.
On the first ride with these I went for it and wore no gloves or liners and experienced something very unusual for a cold weather ride…sweaty hands! I must say, these were a game changer for me. I loved the ability to not wear gloves, allowing me to use electronics, eat and drink unencumbered, while still keeping my hands warm. In fact, one downside was that the sweat made the grip a little slippery inside the covers. I would recommend adding a pair of thin fingerless gloves to use in addition to the covers. The thin gloves will help absorb moisture without sacrificing anything else. My hands were warm, but what about the biking? There are a few things to consider here, since the shifters and brakes are covered, you need to pay a bit more attention and keep your hands inside, predominantly in the relaxed position. The covers don’t allow for getting down into an aggressive position on the drops. To me this isn’t really a problem, If I am going for a cold weather ride I’m less concerned about cranking out watts than getting time in the saddle. Although it only takes a second to get your hands inside, it could still be enough to throw you off your game, especially if needing to reach your brakes in a hurry, just be aware.
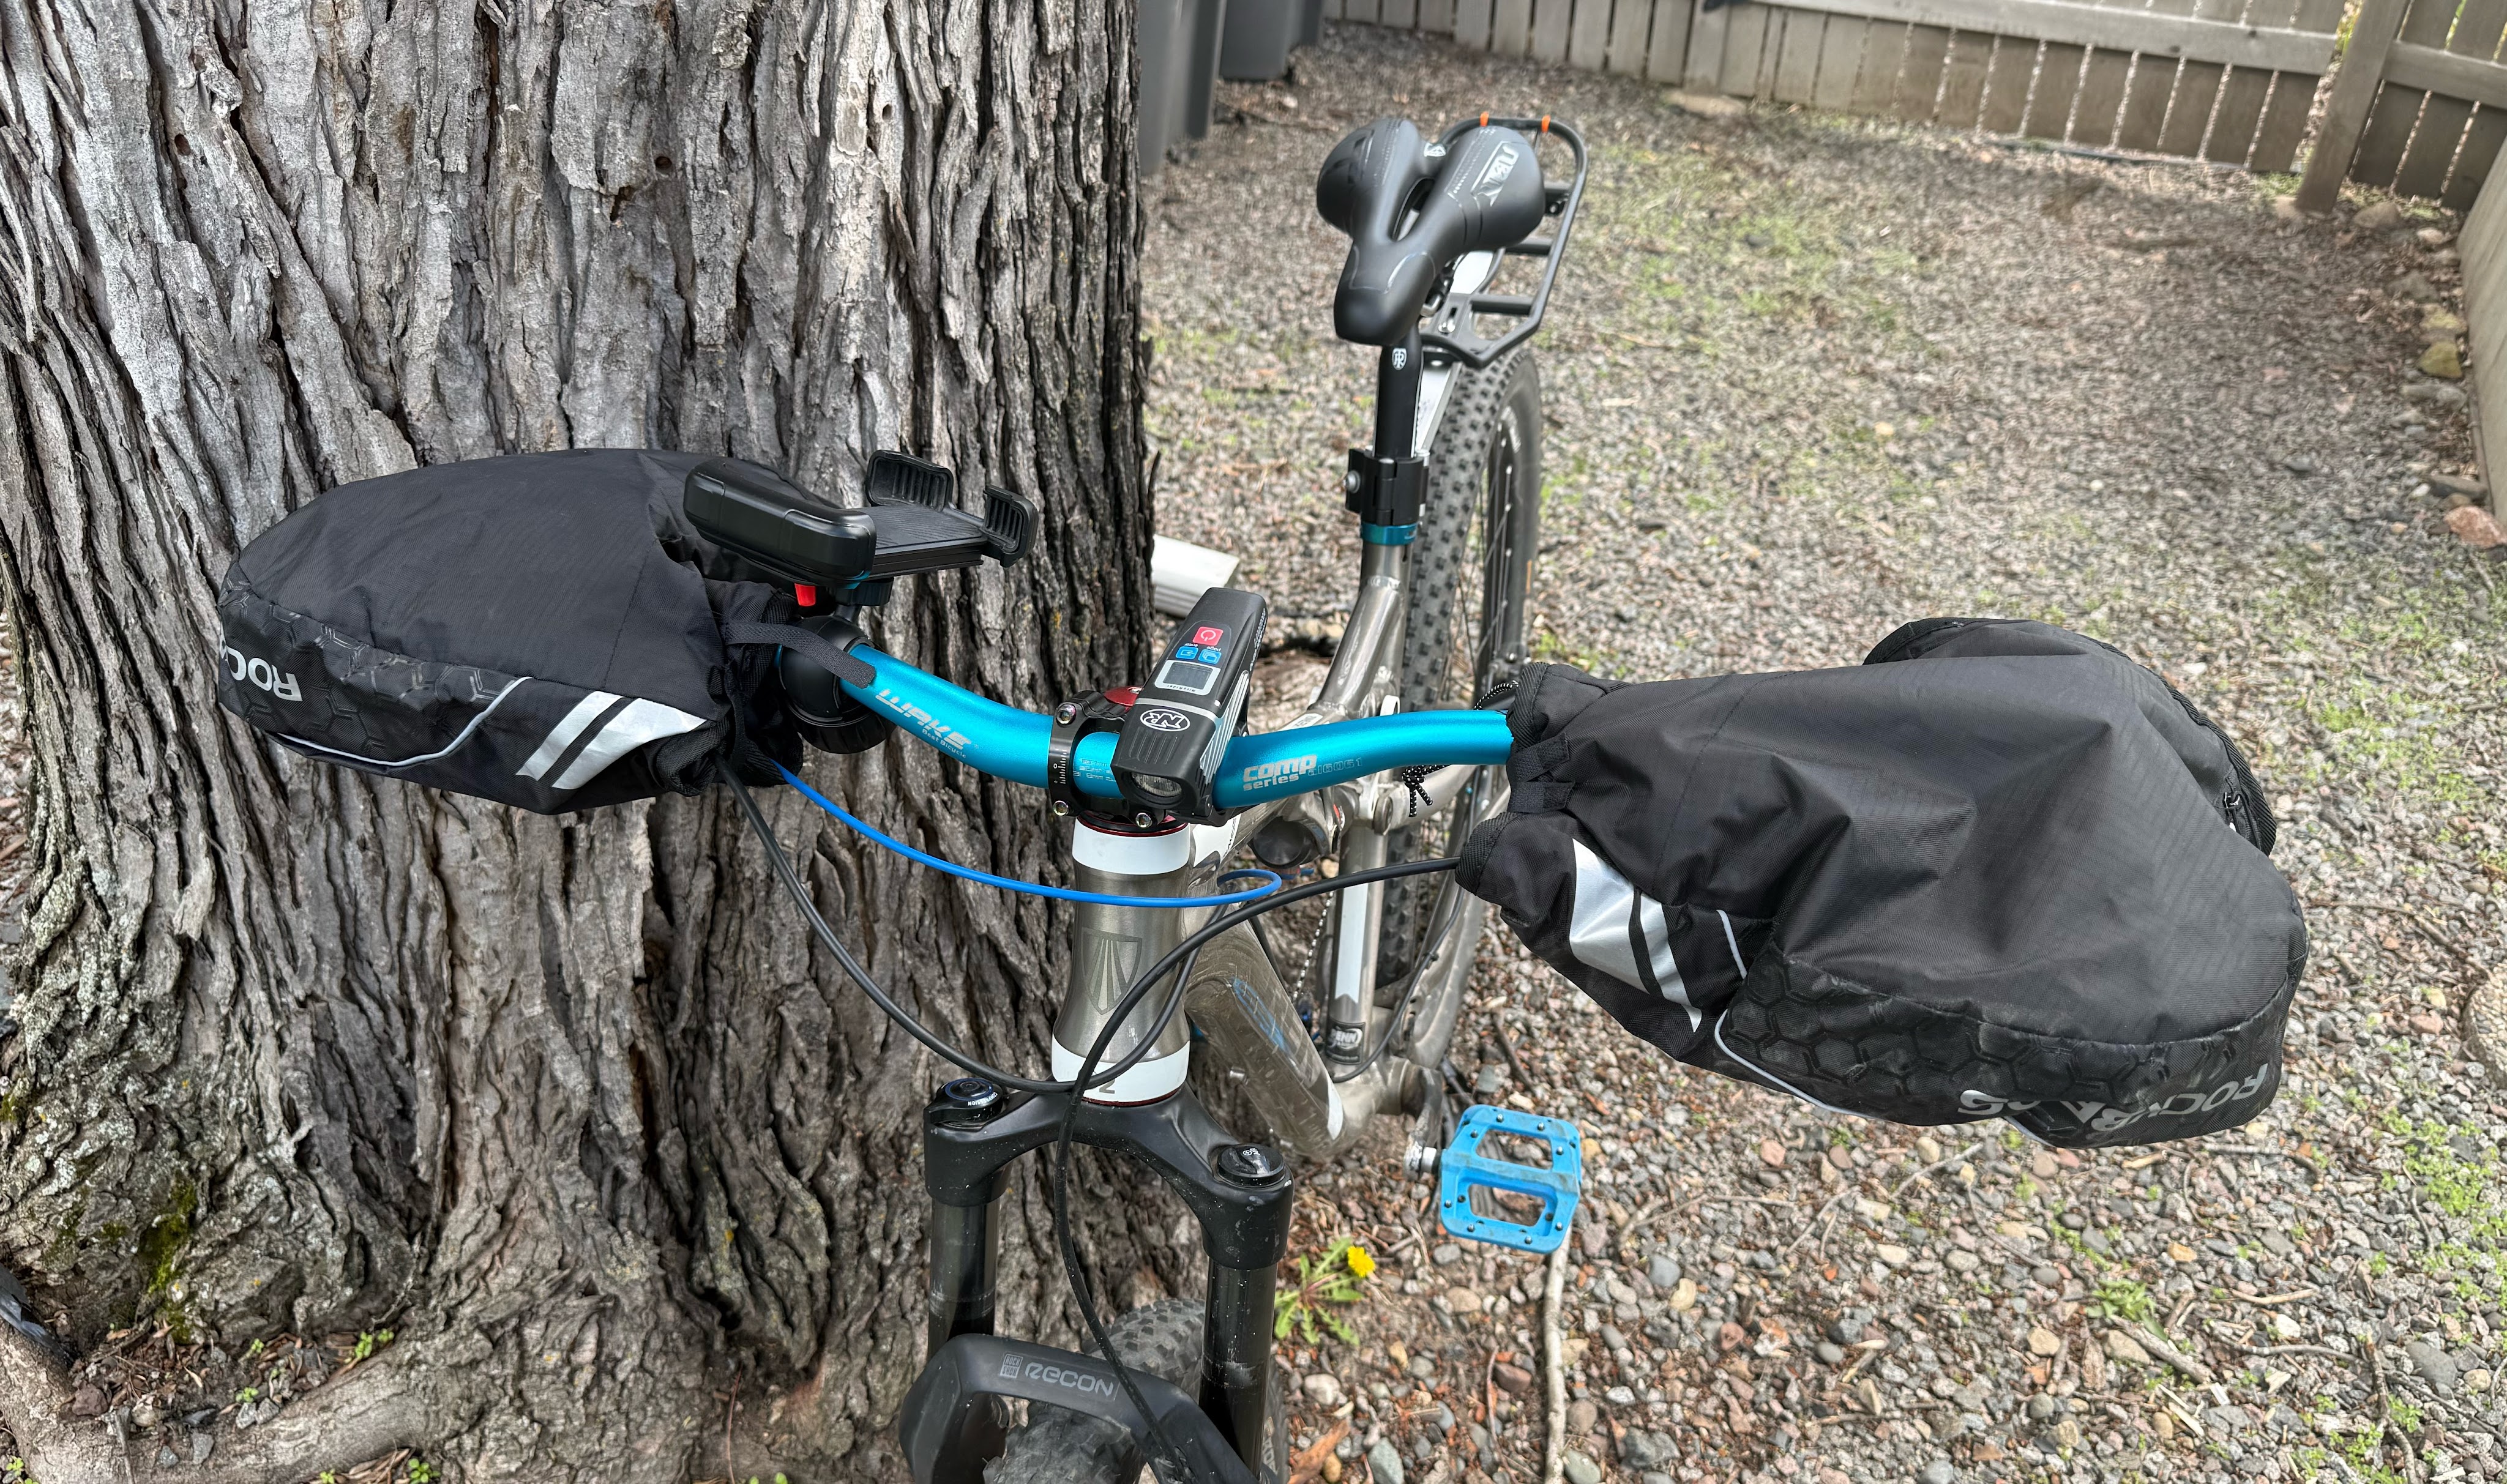
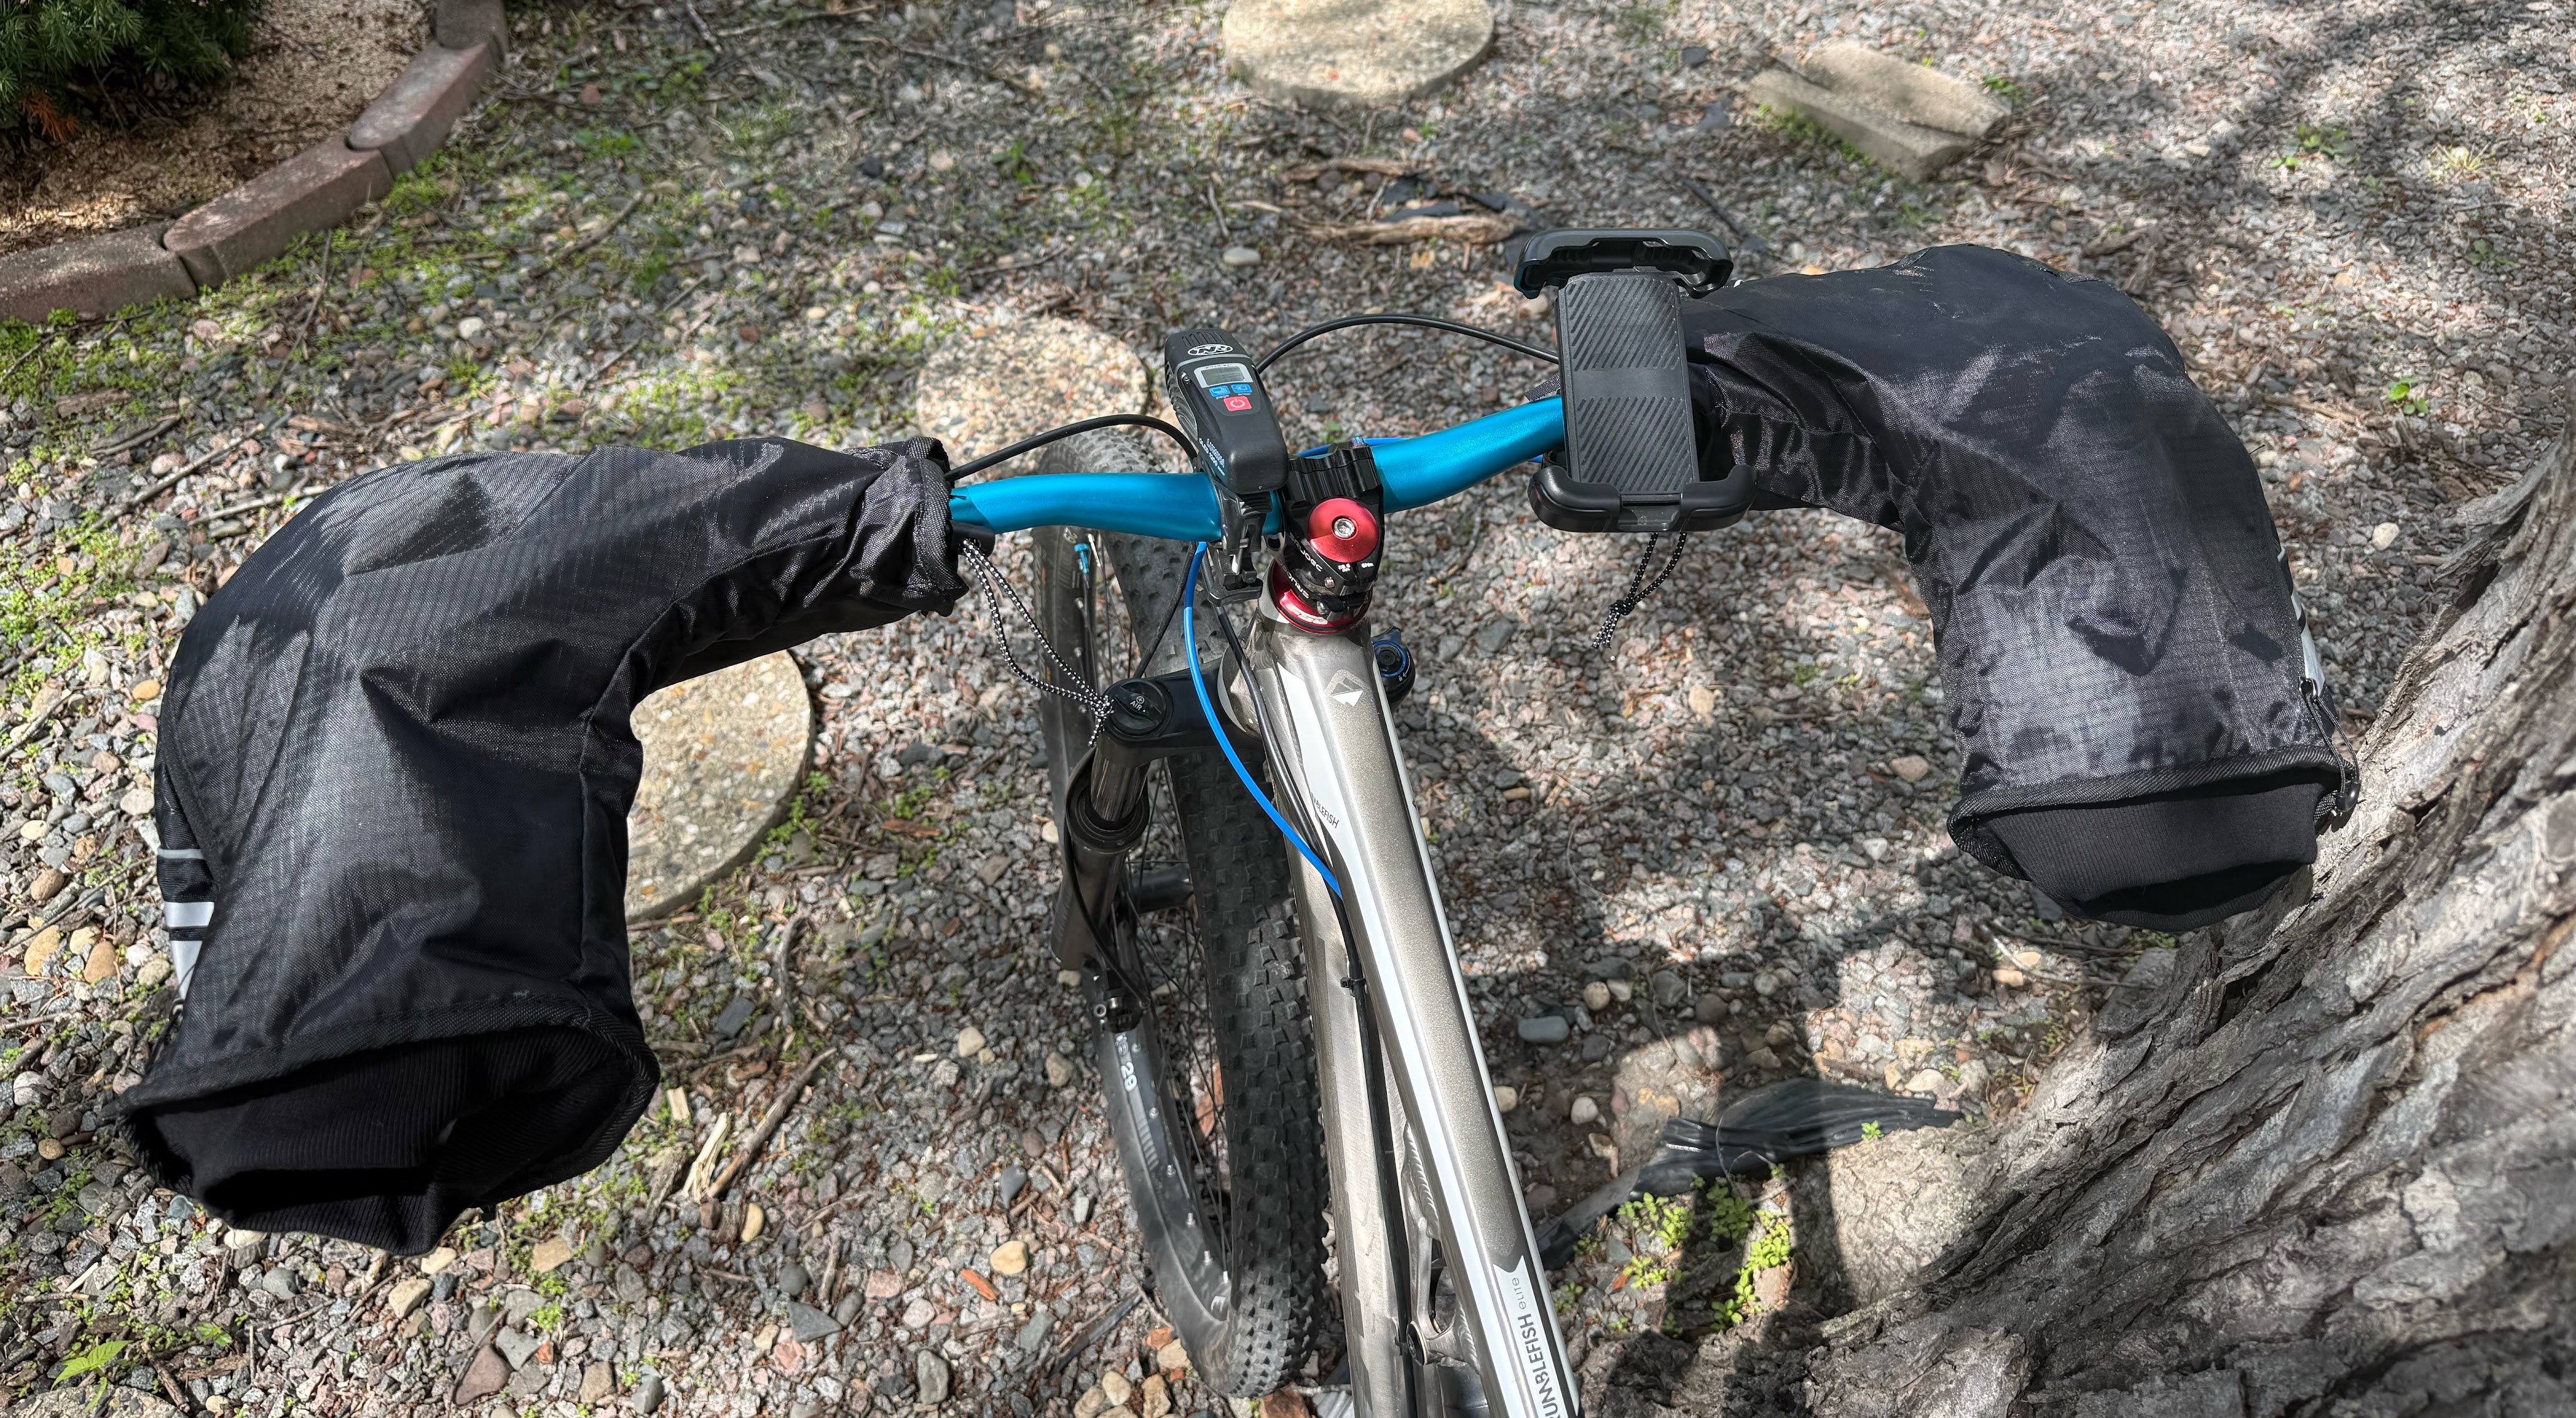
The next pair of covers are made for a flat bar bike. These slide on from the end and cinch down with velcro and shock cord. The style of these is more like a puffy winter coat with cuffs, but the result is the same: warm hands, but you might want a thin liner for moisture control. This style was just a bit more difficult to get your hands in and out of due to having less structure than the neoprene, but also felt more “cozy”. I don’t do any winter fat-biking, but I would imagine these would excel. My wife rides a flat-bar bike to work and she uses these on her commute whenever the temperature drops. They are easy enough to use in the morning but take off and put in a backpack if the temperature warms by the afternoon.
When the weather still calls for an underlayer, these mittens save the day for me. There are many different styles, brands and materials, but here are the two that I purchased on my own dime and will continue to use. Note that the branding on the drop bar mittens is different from what is pictured, but I double checked my purchase history and they are the same.
 silent sports